



{{ rel.version }}
{{ rel.date }}
New
{{ rel.title }}
{{ rel.summary }}
{{ grp.kind }}
- {{ li.text }}
Quick answers and step-by-step guides for managing your Resi site day to day. Search the guide, or jump to a section below.
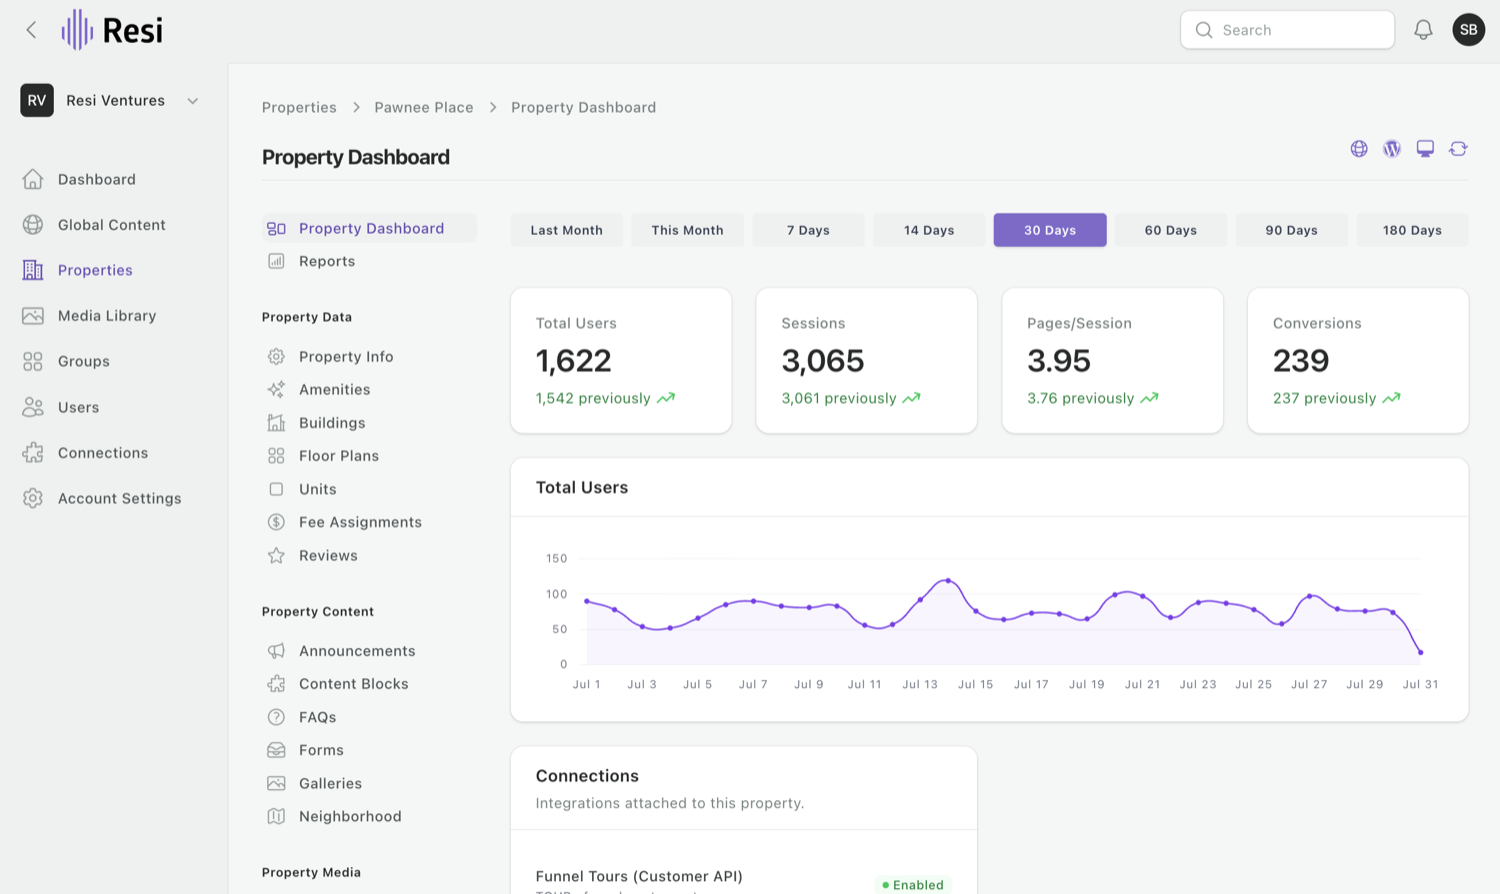
When you sign in, you land on your Property Dashboard - the home base for a property, with your website traffic and quick stats up top. Tap any highlighted spot below to see what it does.
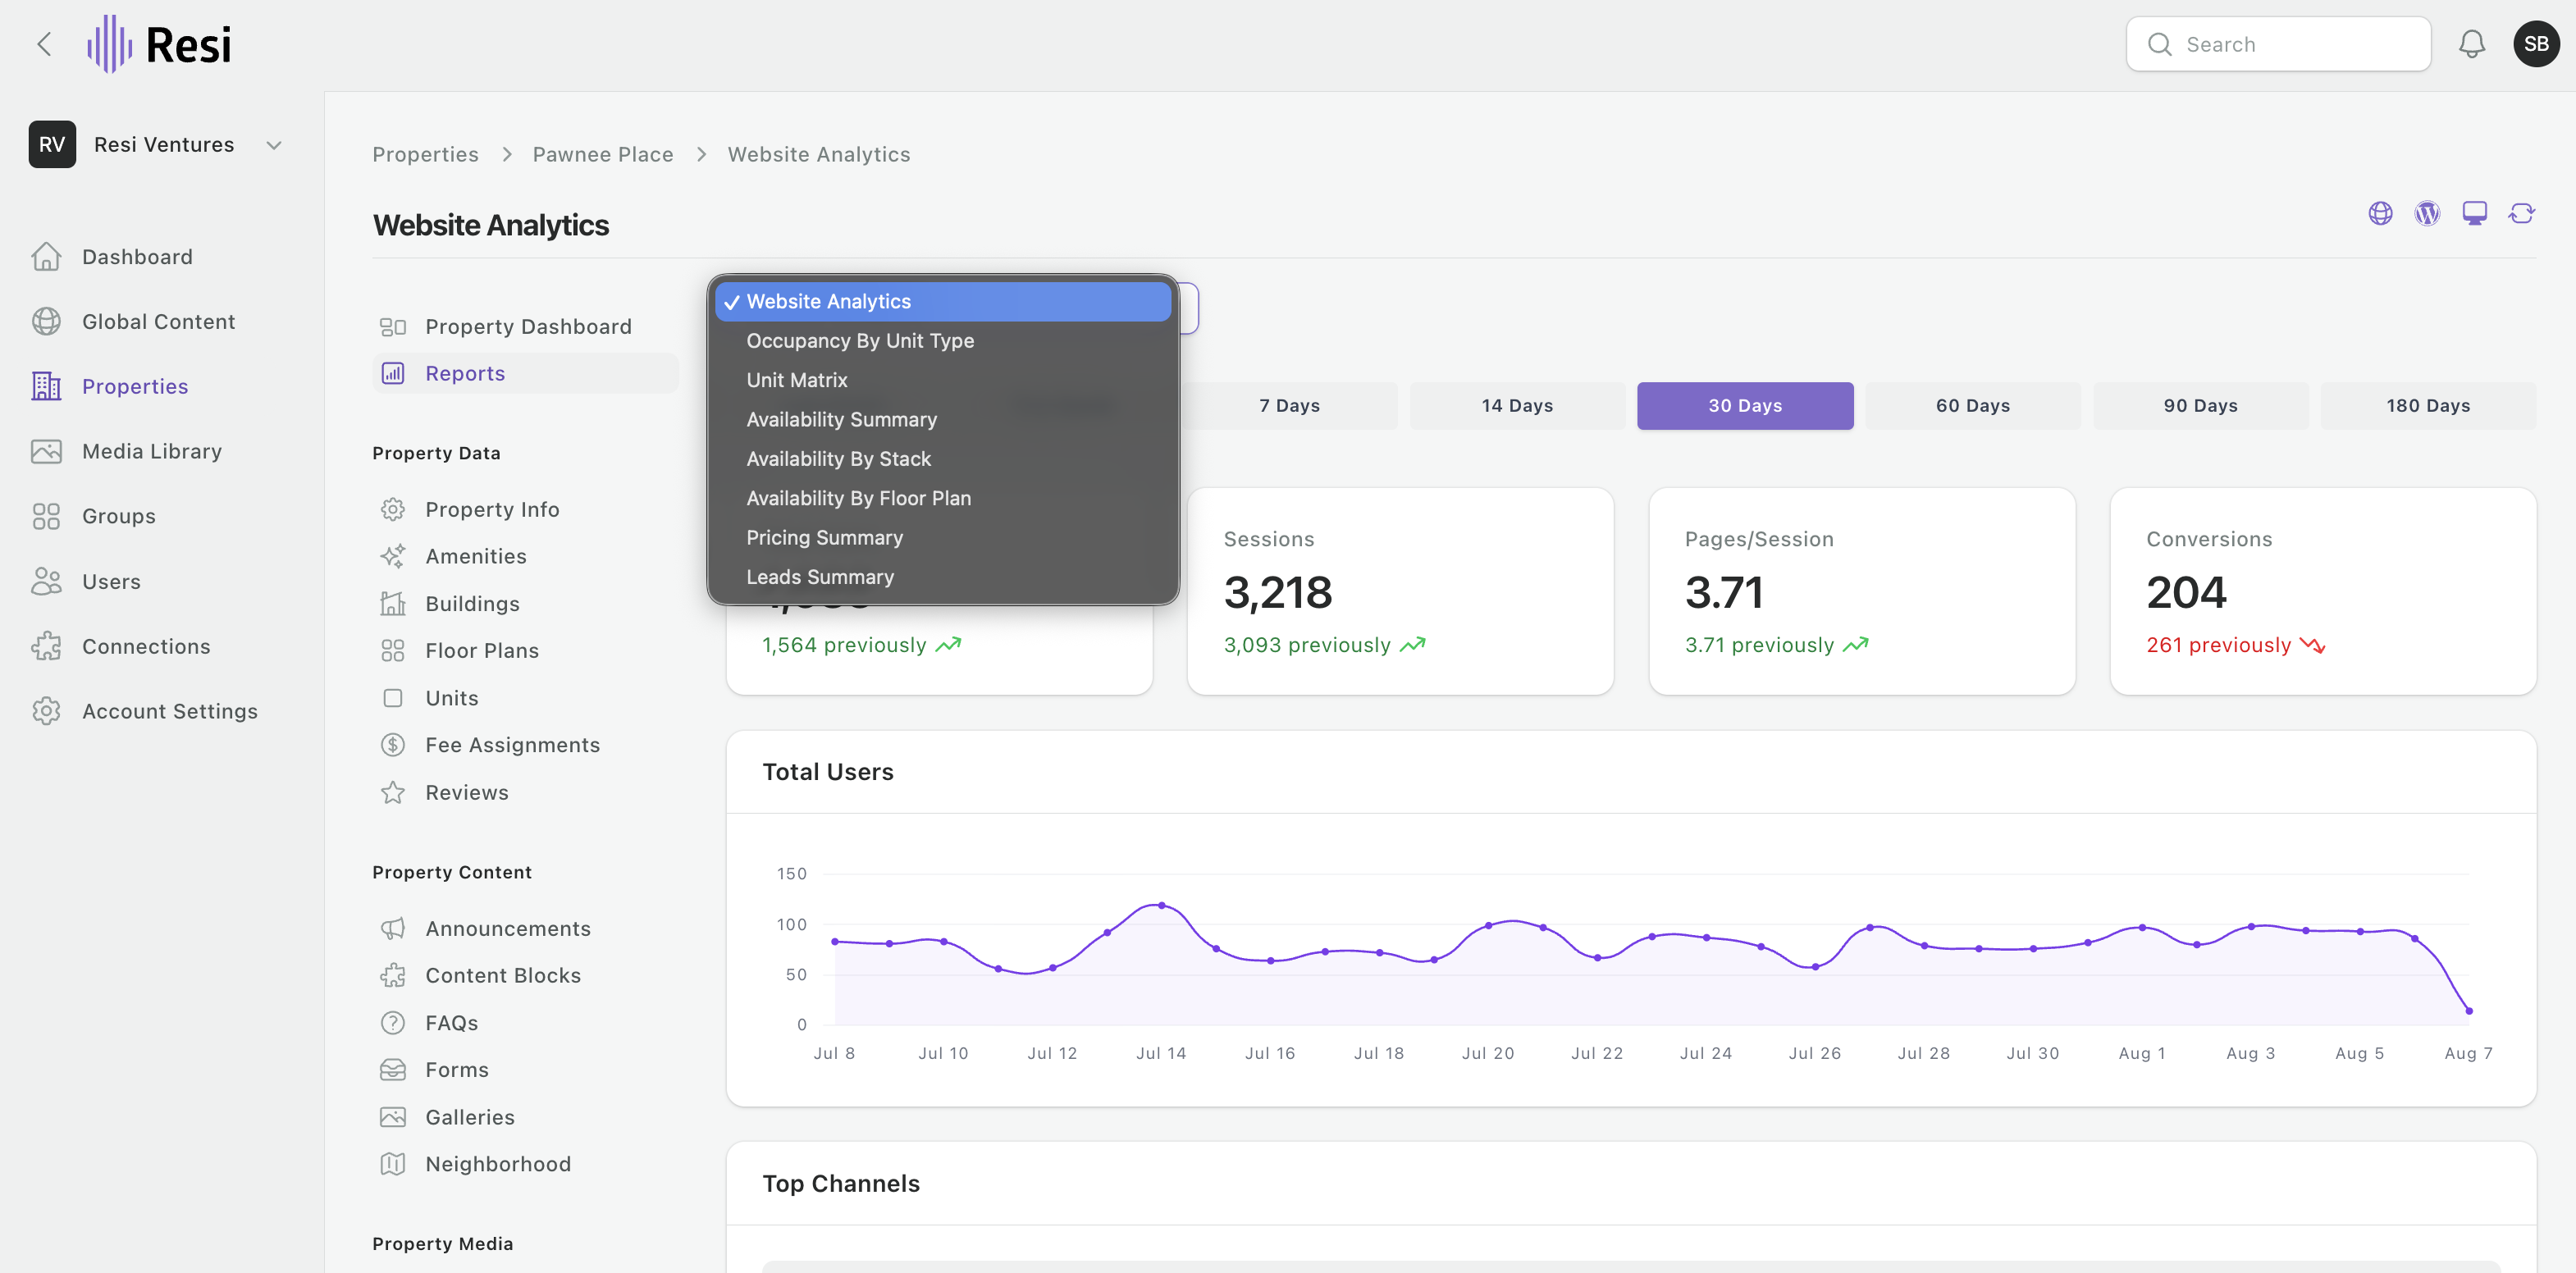
Open a property and choose Reports to see how your site is performing - website analytics up top (sessions, pages/session, conversions), plus occupancy, availability, pricing, and leads reports. A quick read without leaving Resi.
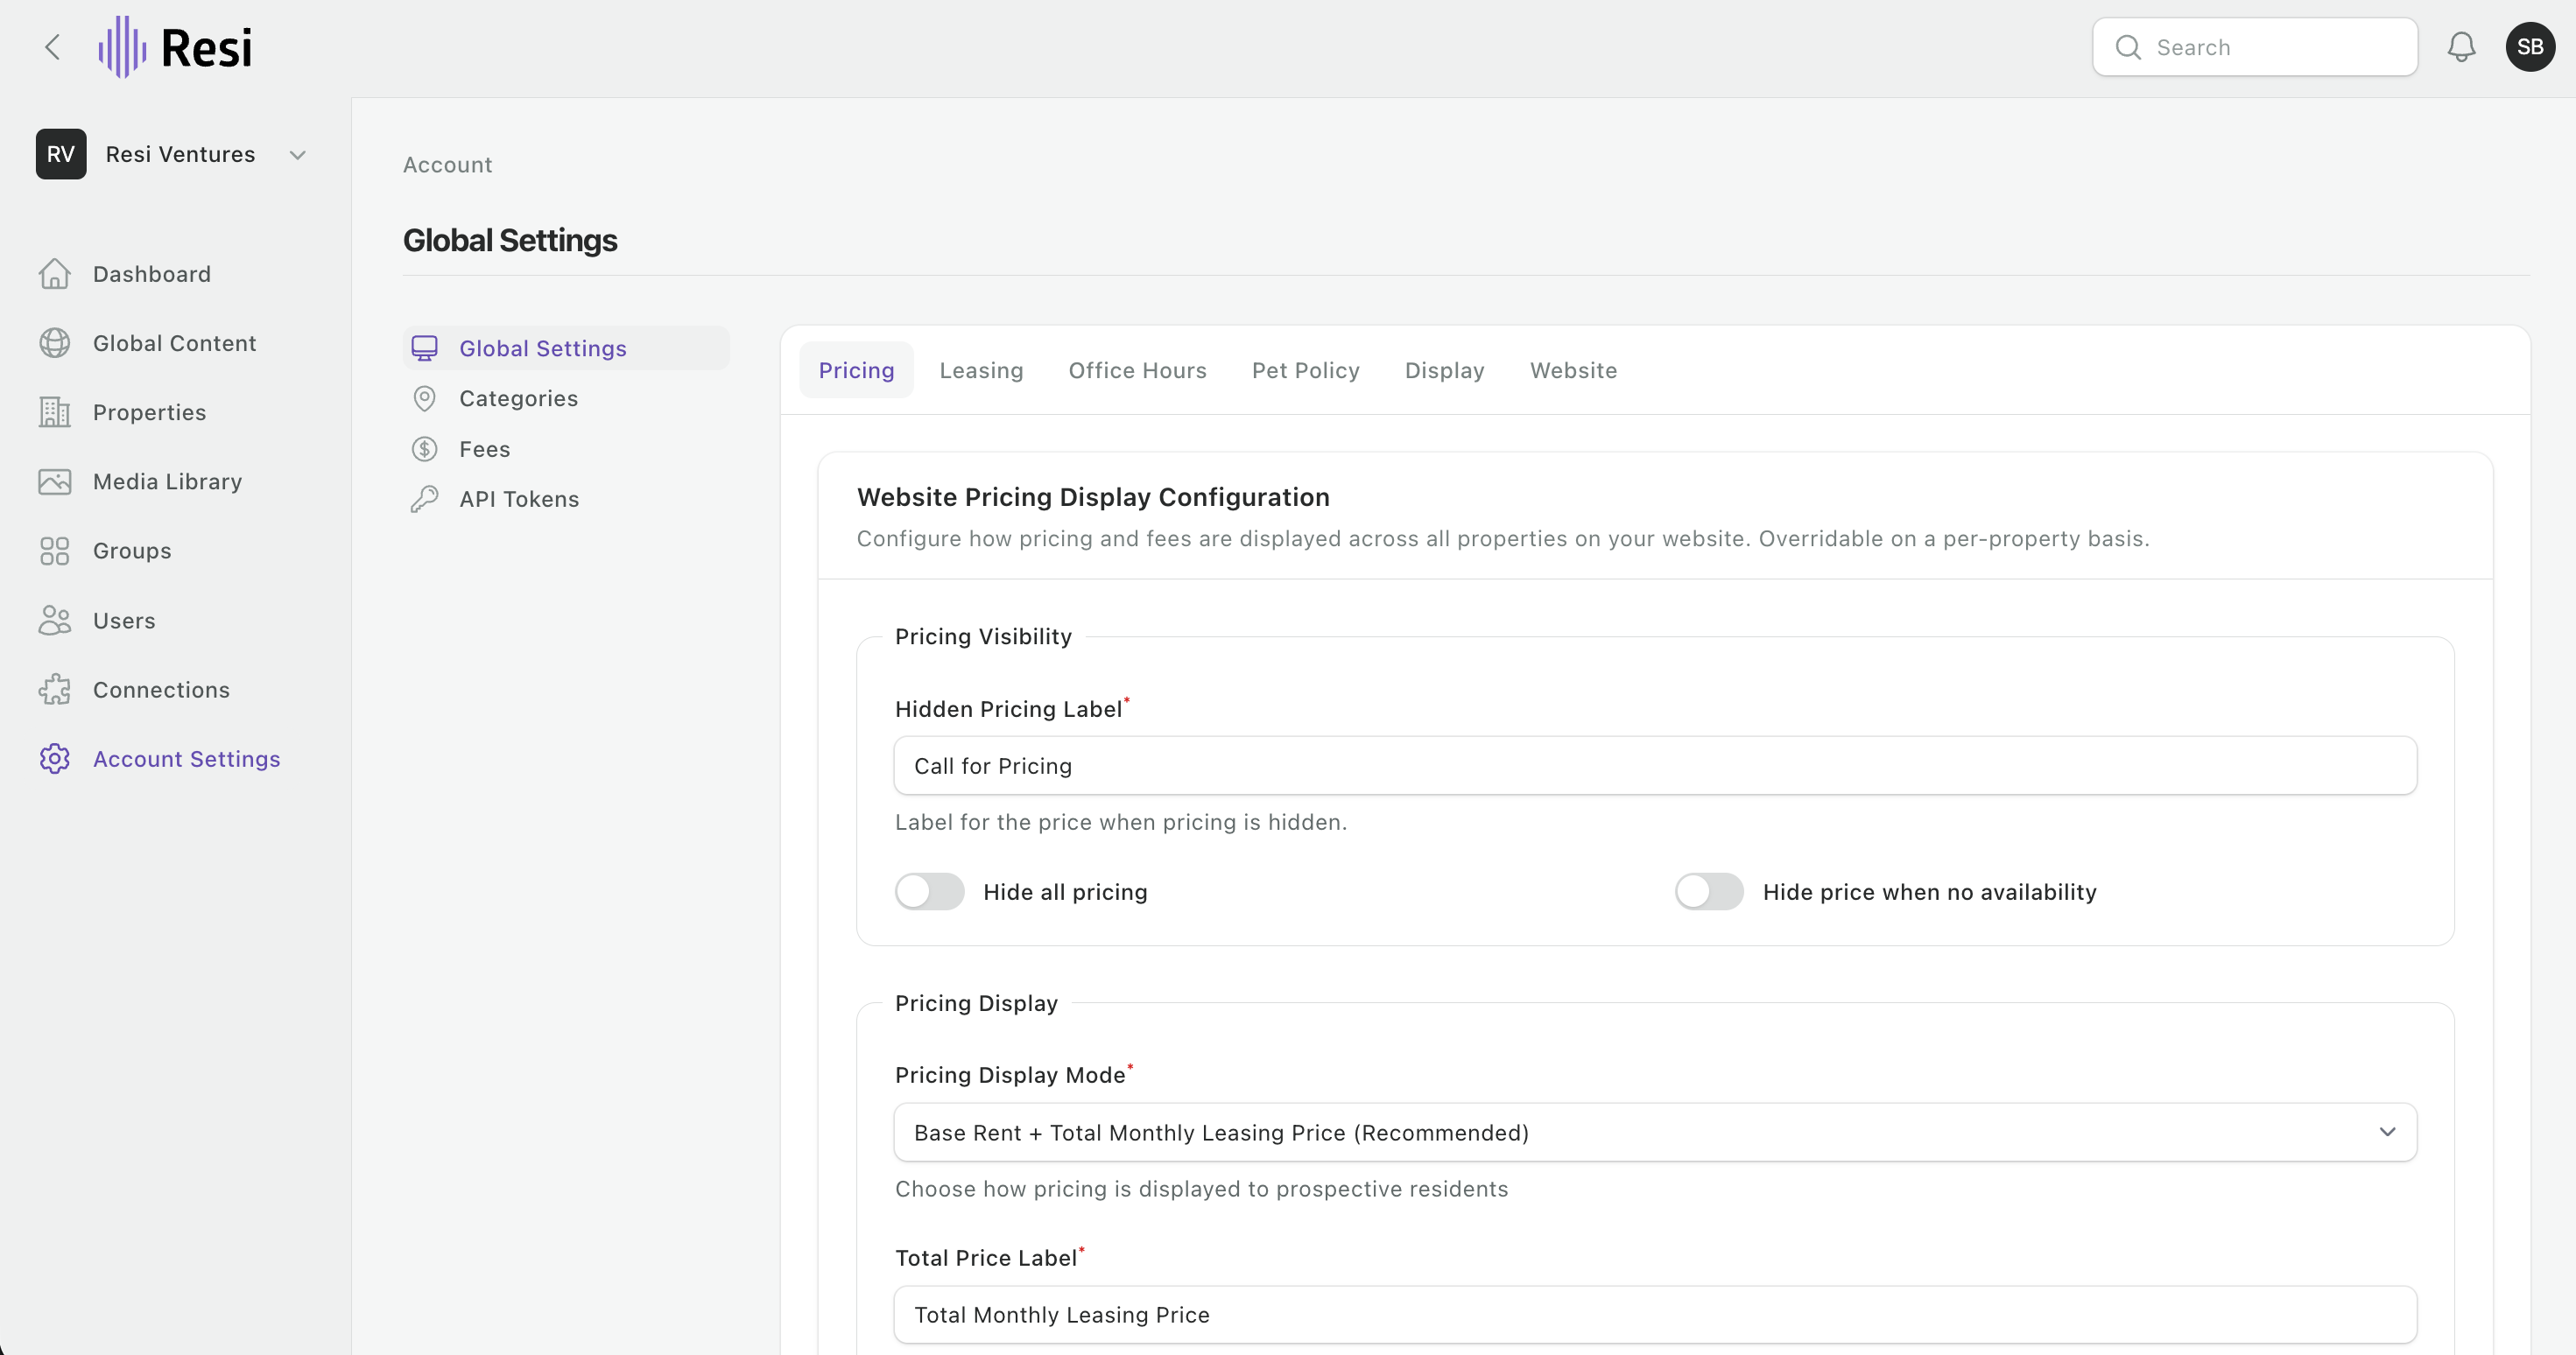
V2 is built so there are as few places as possible to change any one thing. Settings live at the top, at your account level, and flow down to every property. When a handful of properties need something different, you override it there and leave the rest alone.
Labels and disclaimers, leasing settings, hold period, availability window, office hours, pet policies, display settings, and website settings. Anything common across the portfolio belongs here.
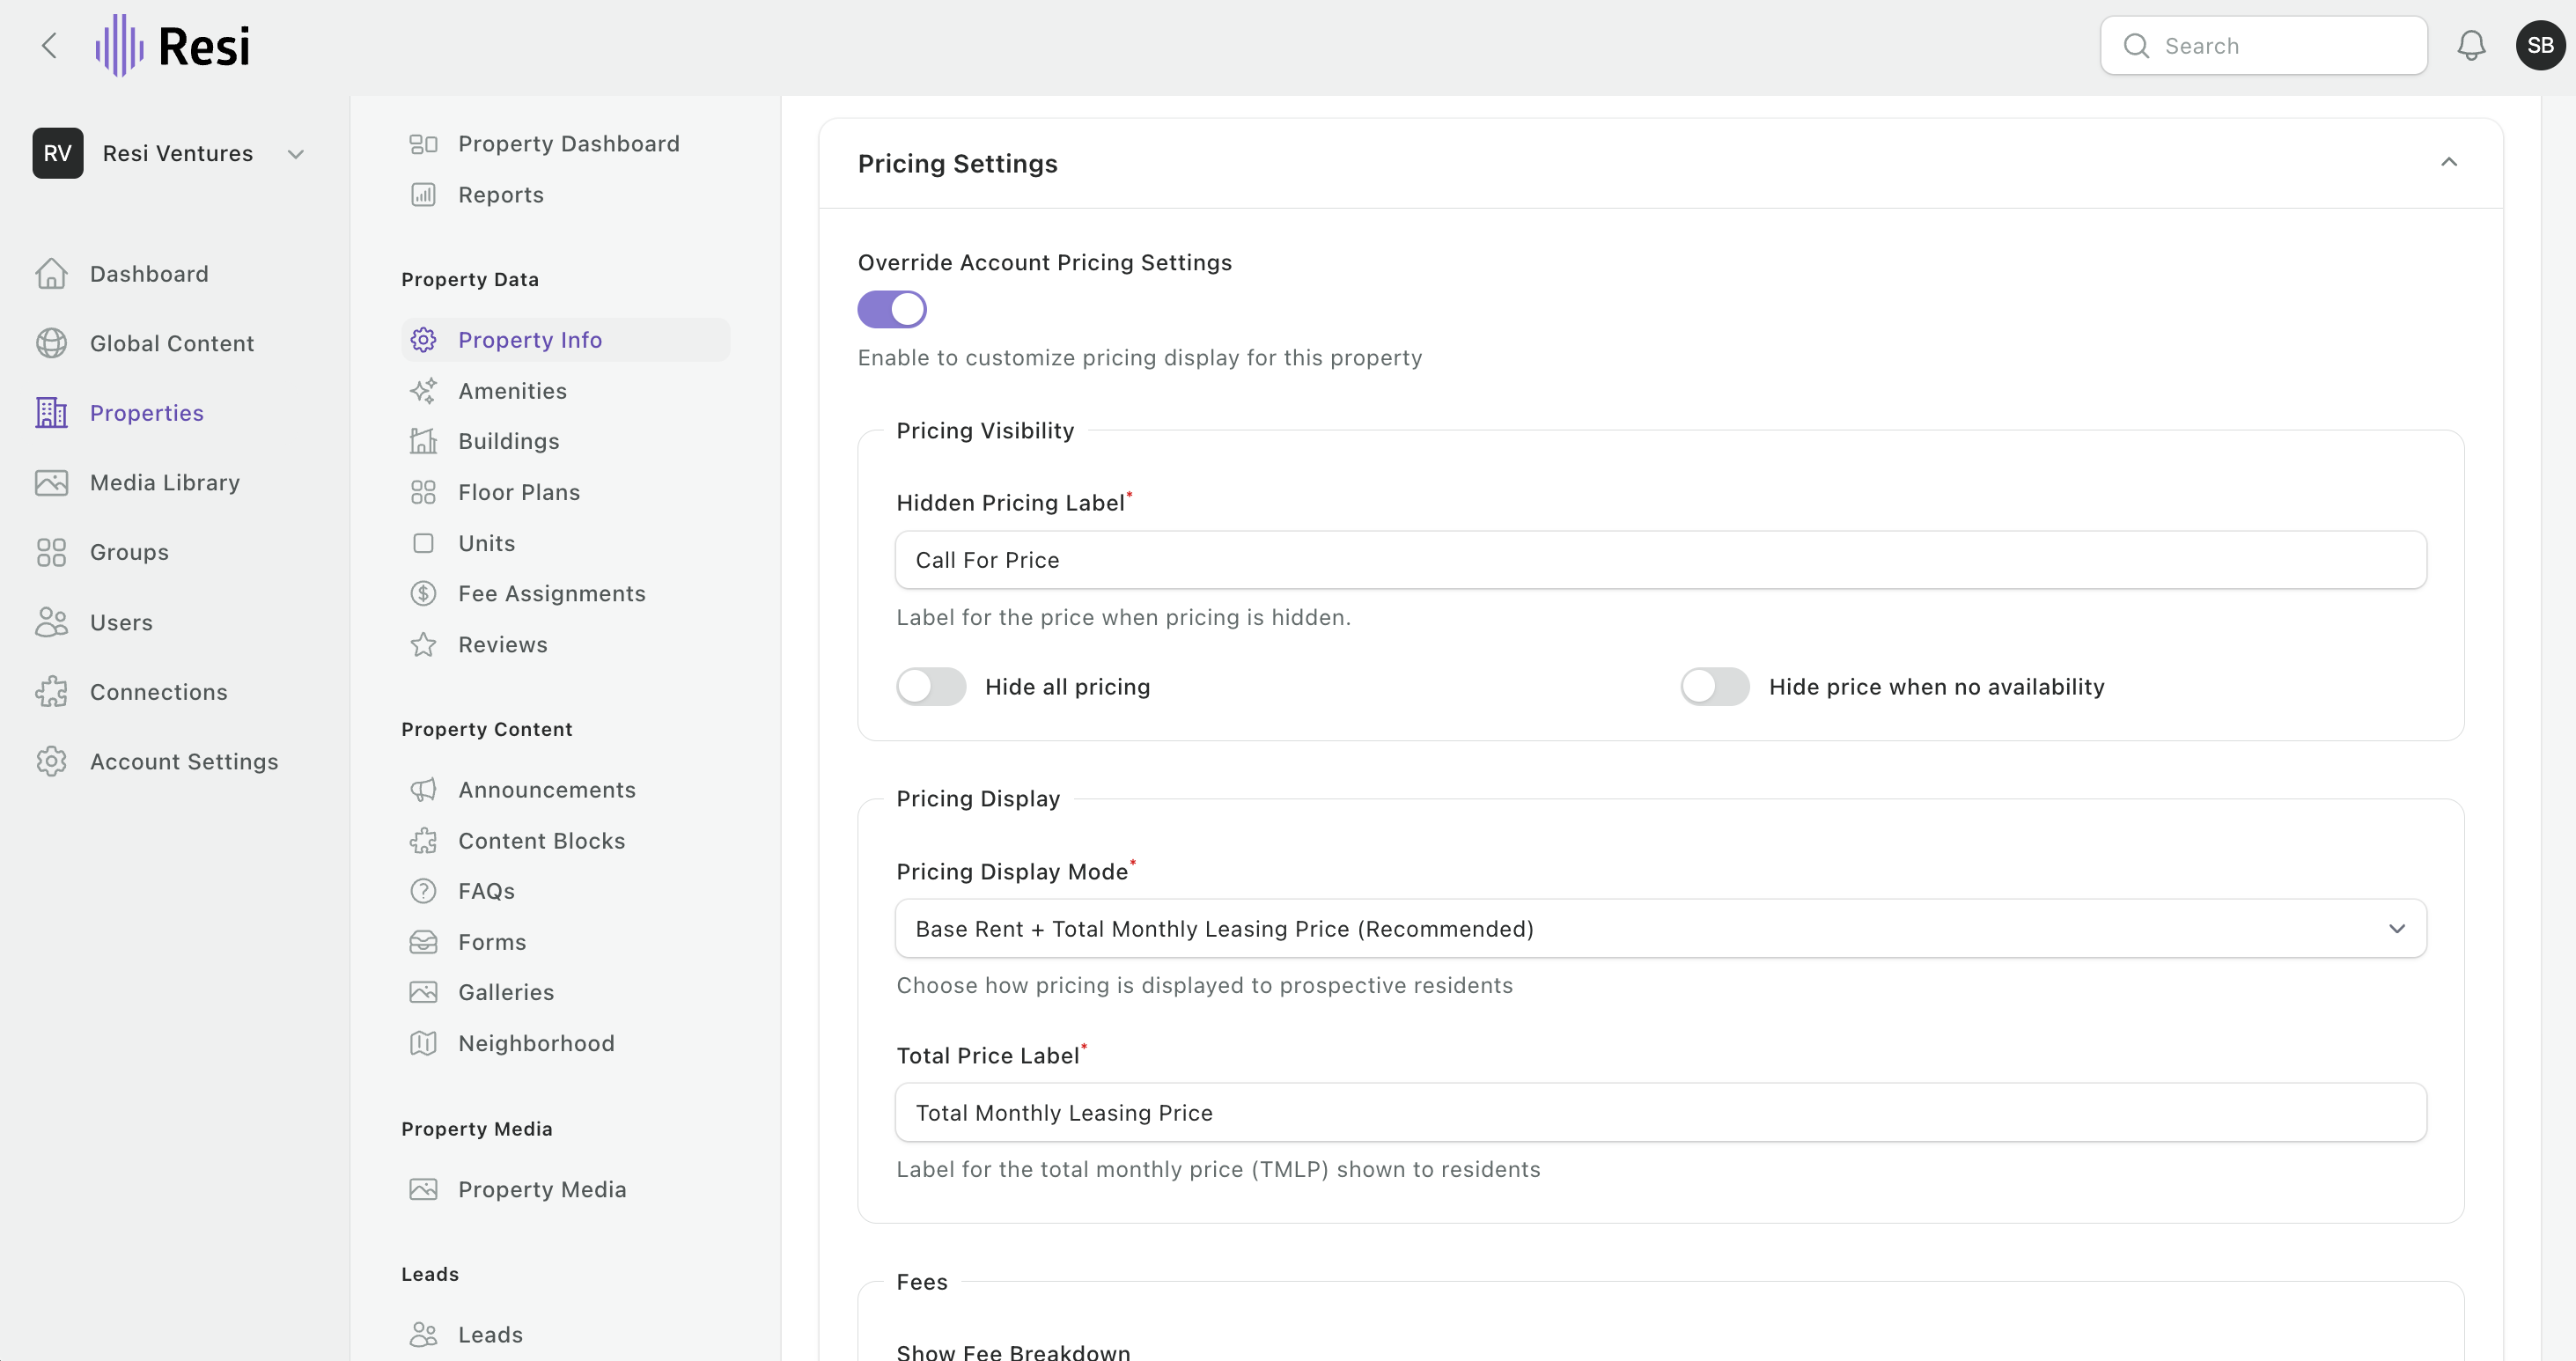
Every account setting can be overridden on a single property. Set it globally for the forty that match, then override the five that don't.
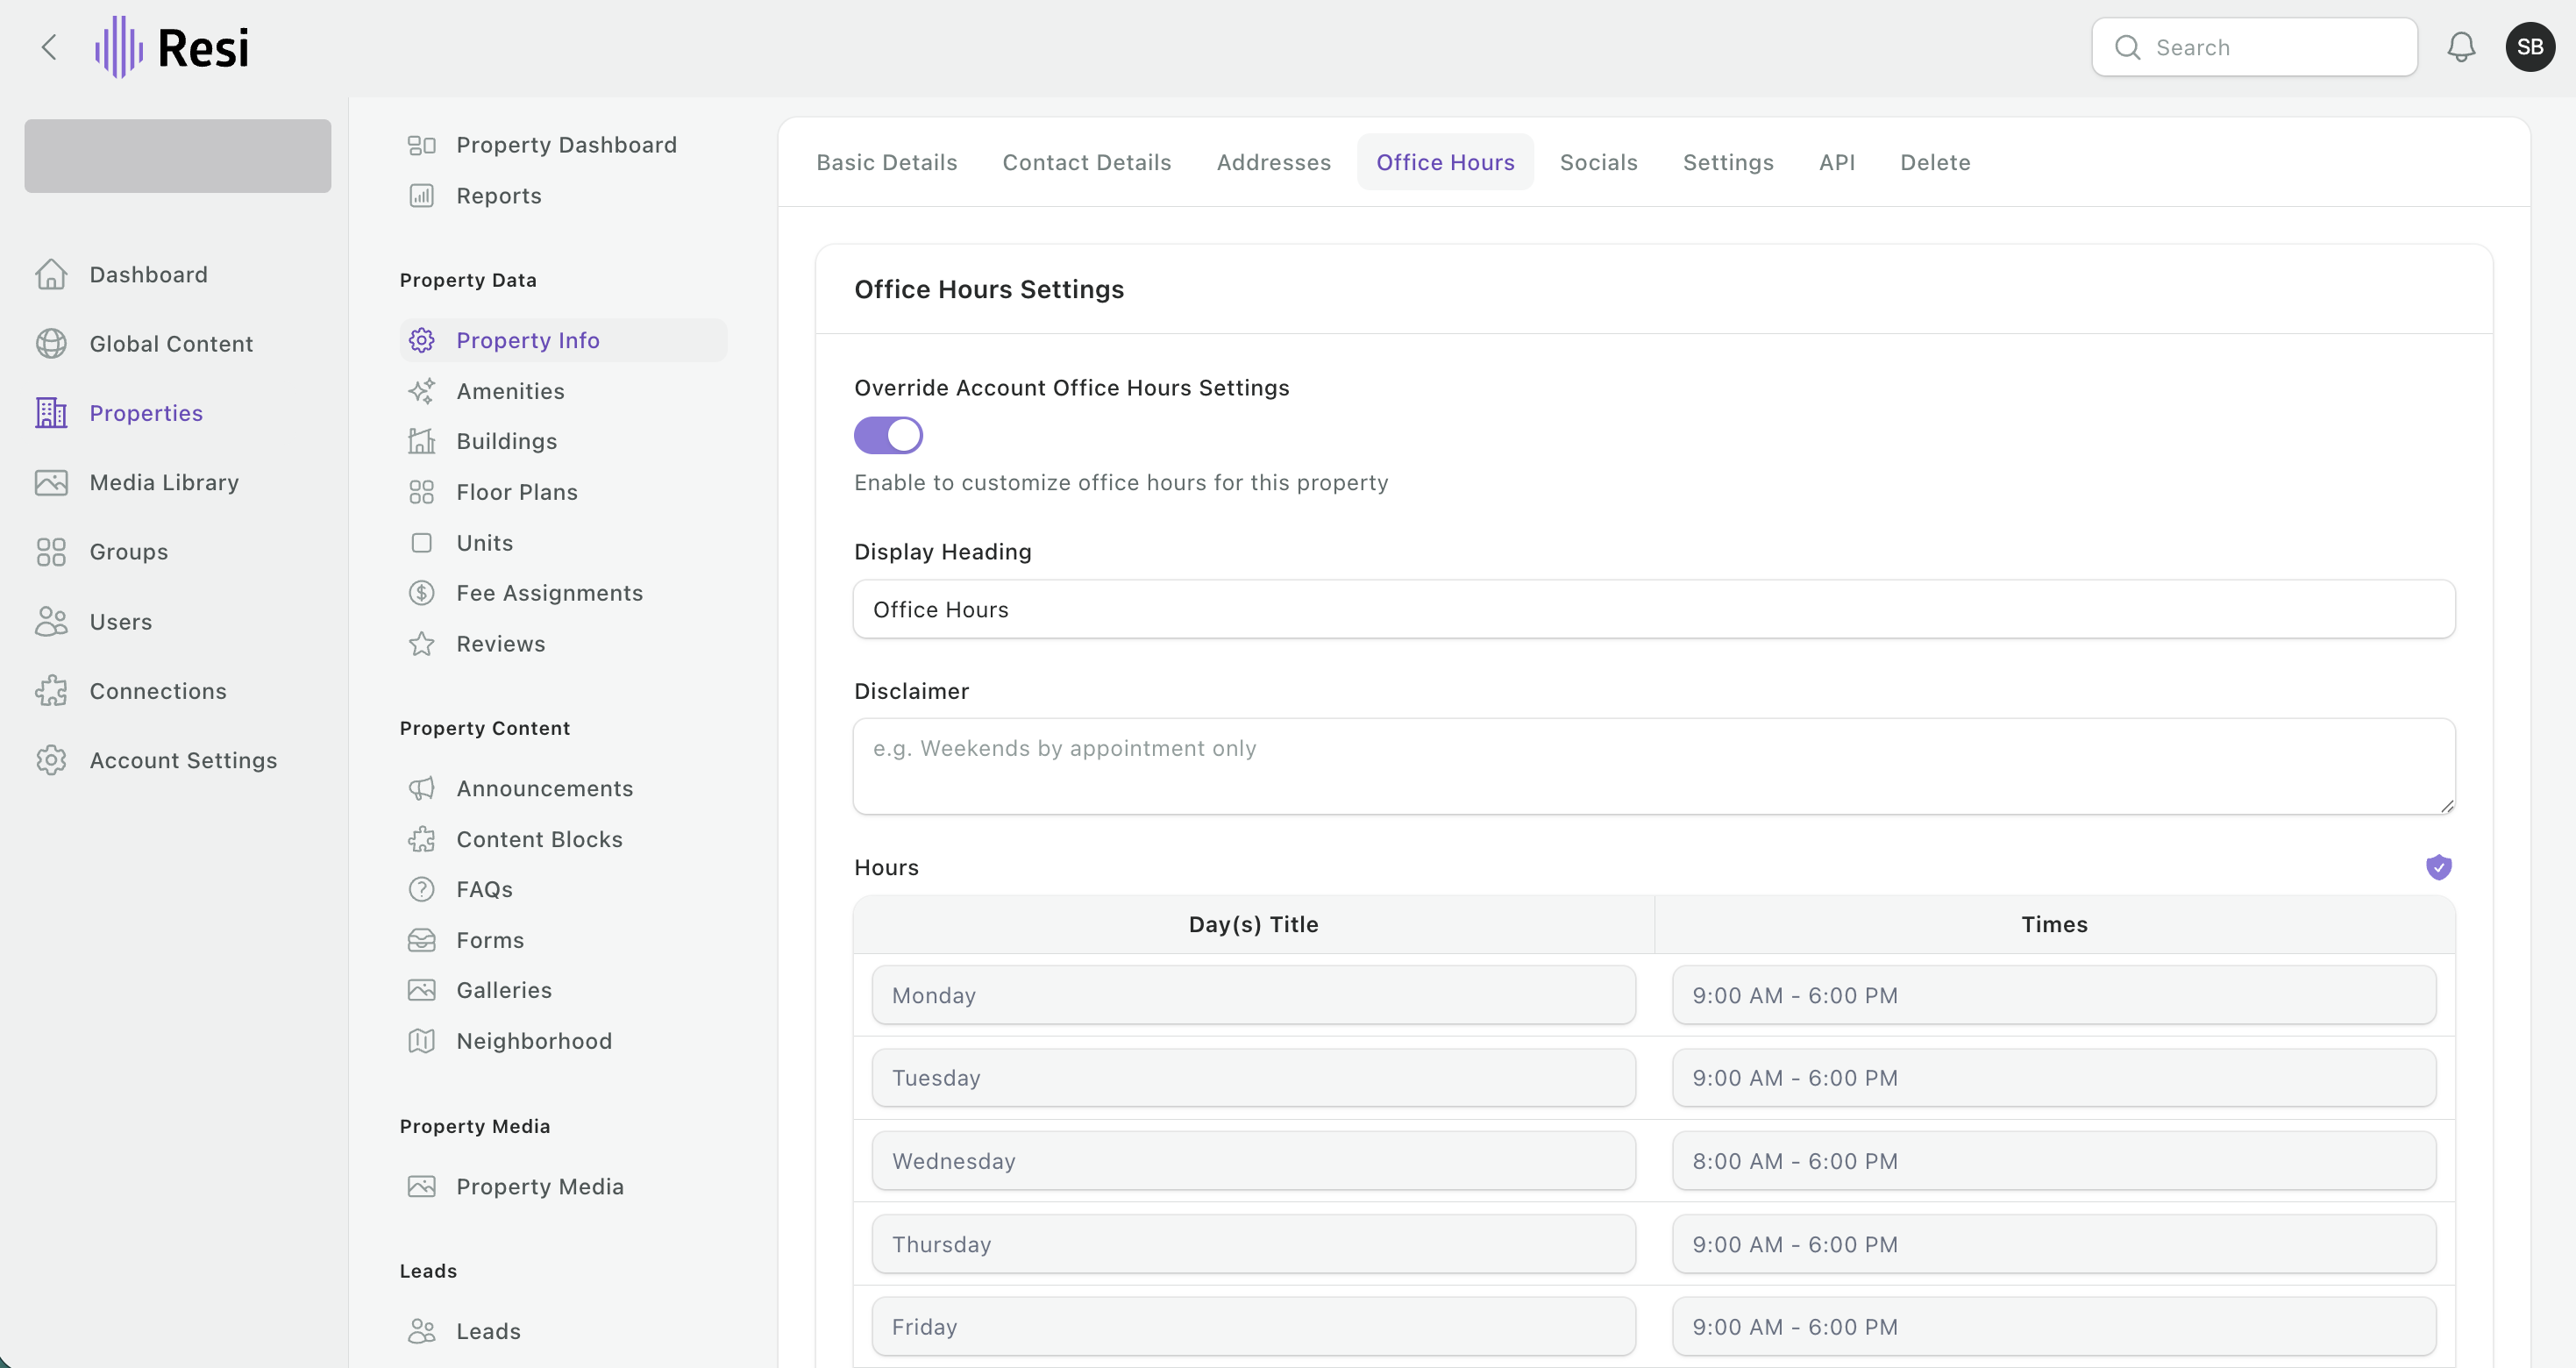
Wherever a value comes from your leasing feed, Resi marks it with a small purple shield and greys the field out. That's how you tell at a glance whether an edit belongs in Resi or in your PMS. Office hours are a common example: if your PMS sends them, the property overrides the account setting automatically. Everything without a shield is yours to edit.
A shield doesn't have to be permanent. On the connection itself, you can choose which fields sync. Switch one off and the shield disappears, the field unlocks, and Resi stops overwriting it - so you can write your own version and keep it. Whole steps can be turned off the same way if you'd rather manage something, like images, entirely in Resi.
Ask before you unlock something. A field you take off the sync stops receiving PMS updates for good, which is what you want for a description you've written yourself and not what you want for pricing. Send us the field and we'll confirm.
Tip: before you change the same thing on several properties, check whether it exists at the account level.
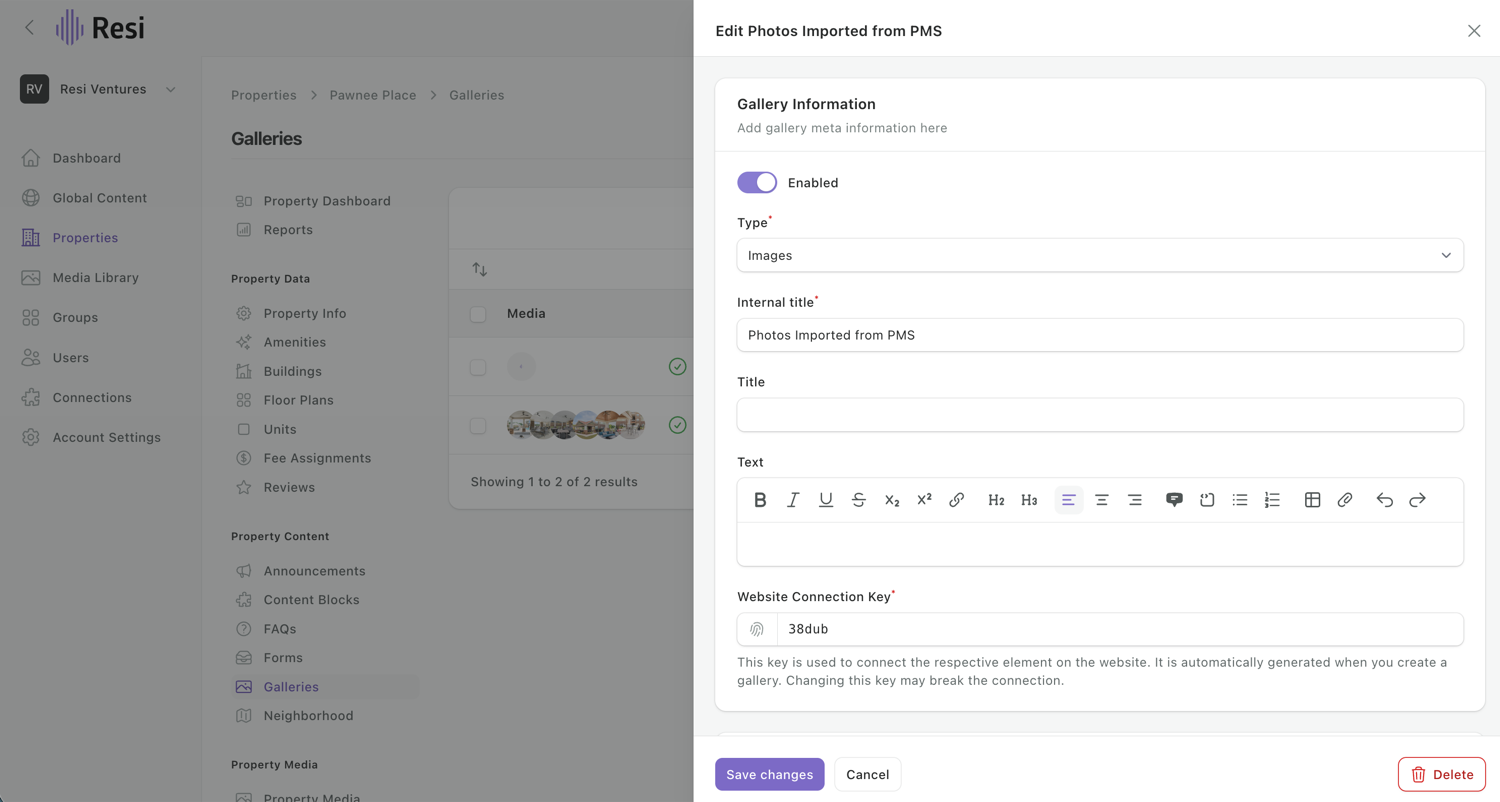
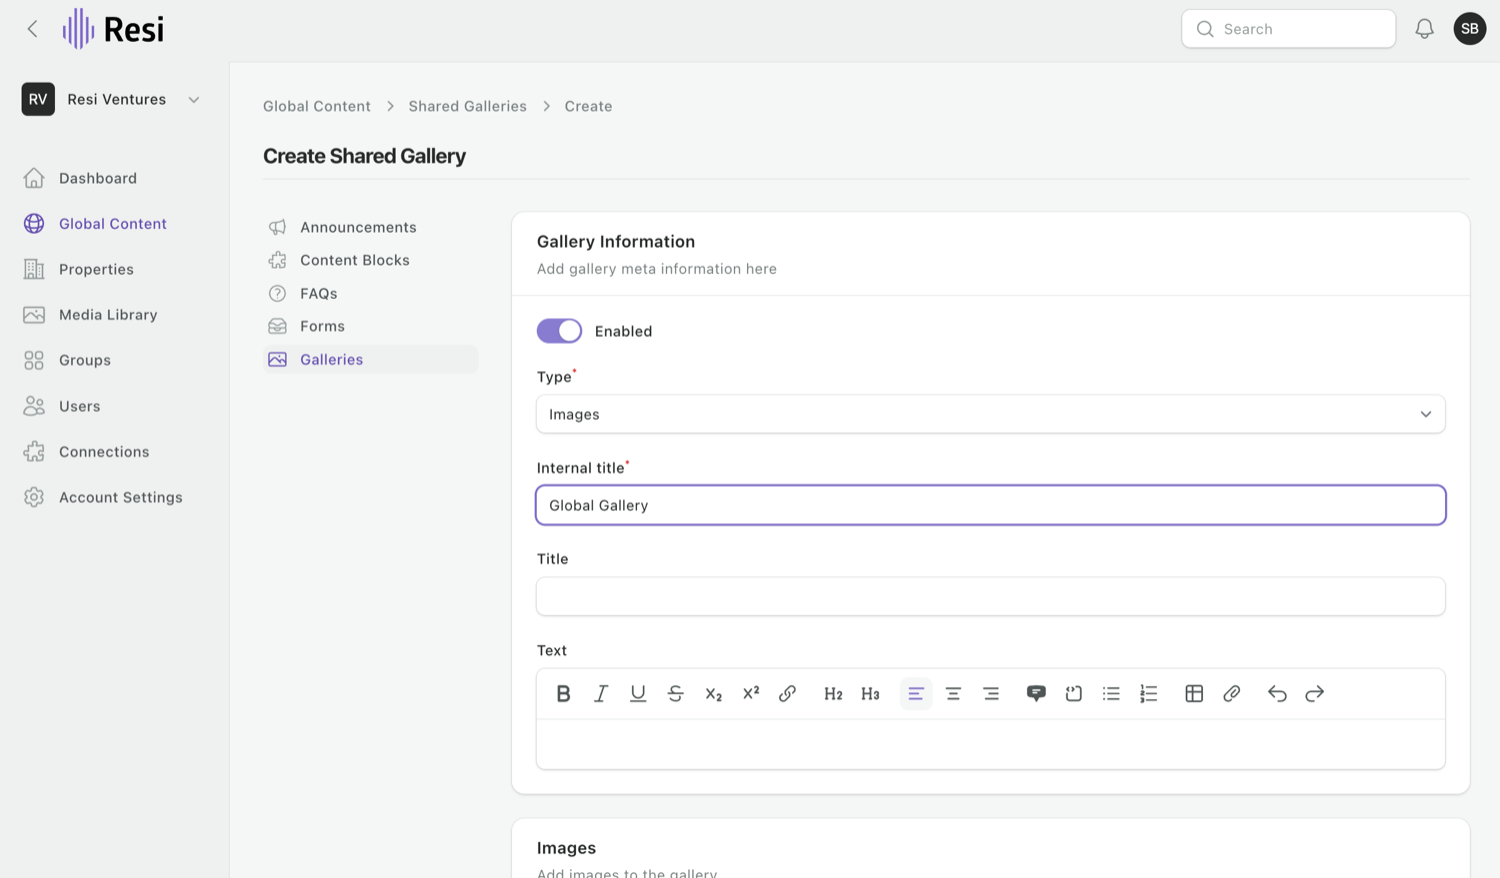
Galleries group your images, videos, panoramas, or virtual tours so you can place them on your site.
Leave the "Website Connection Key" alone. It's created automatically to link the gallery to the right spot on your site - changing it can break that connection.
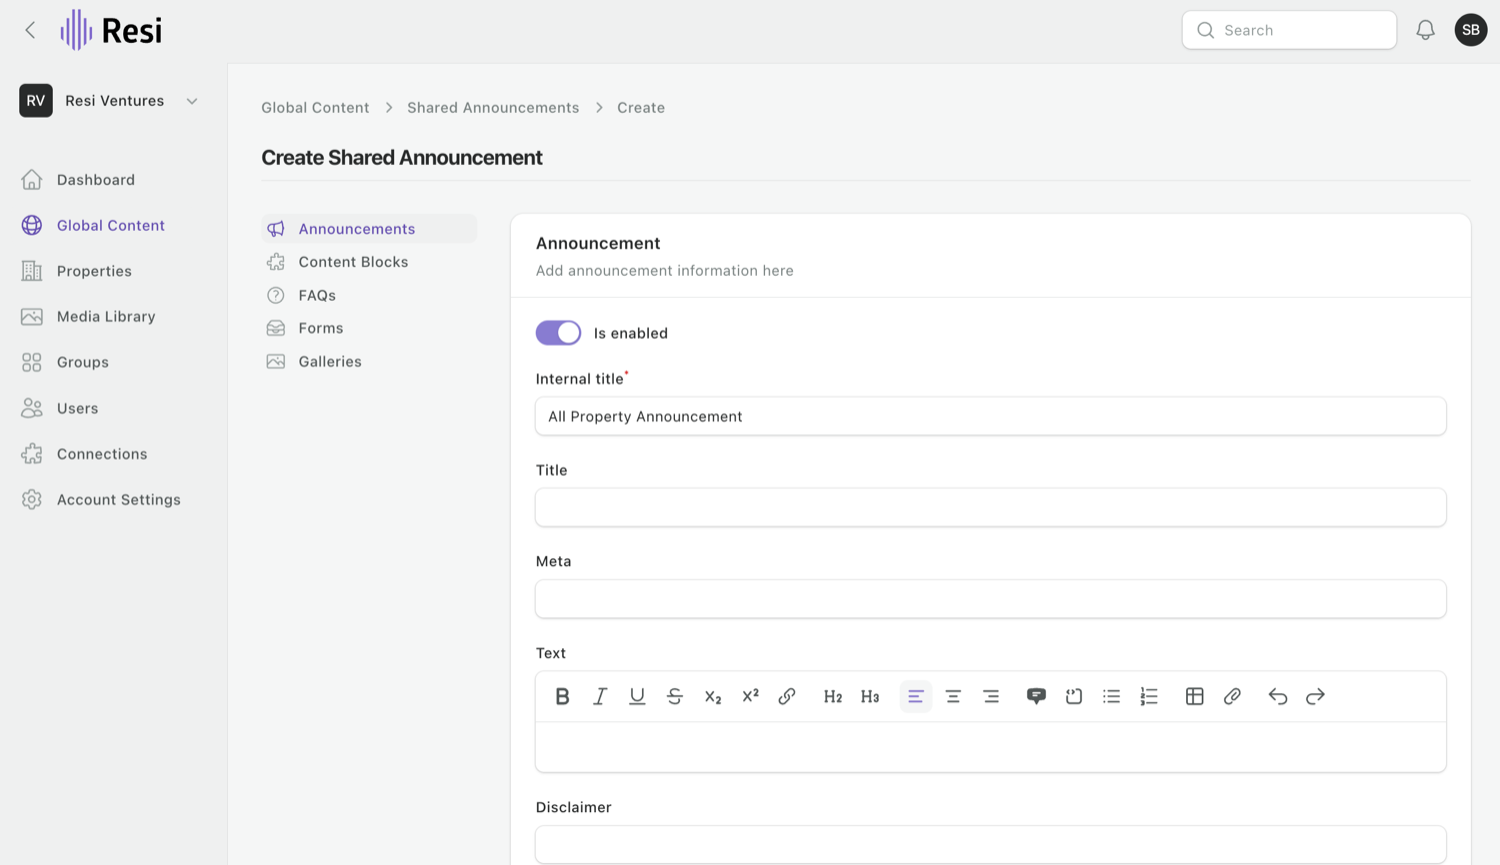
Managing several properties? The same content types also live under Global Content, where you create an item once and reuse it across every property. See Shared vs. property content.
One home for every image on your account. Upload photos, organize them into folders, tag them so they're easy to find, and reuse the same file anywhere on your site.
Every asset that syncs in lands in an imported folder under its property, with its fields carried across. Nothing to upload twice.
Open an image and you'll see the galleries, content blocks, and announcements it's attached to, so you know what a change will affect before you make it.
When a rendering becomes a real photo, don't re-upload it and remap it everywhere. Open the existing image and replace the file. Every gallery, content block, and announcement using it picks up the new version automatically.
Both are set here, on the image, and travel with it wherever it's used. Resi carries across whatever your PMS provides; anything it doesn't send, you can write yourself. Worth doing - alt text is what a screen reader announces and what search engines read.
Adding floor plan or unit photos? Load them into your PMS media library and they'll pull through on the next sync, alongside anything you upload here directly.
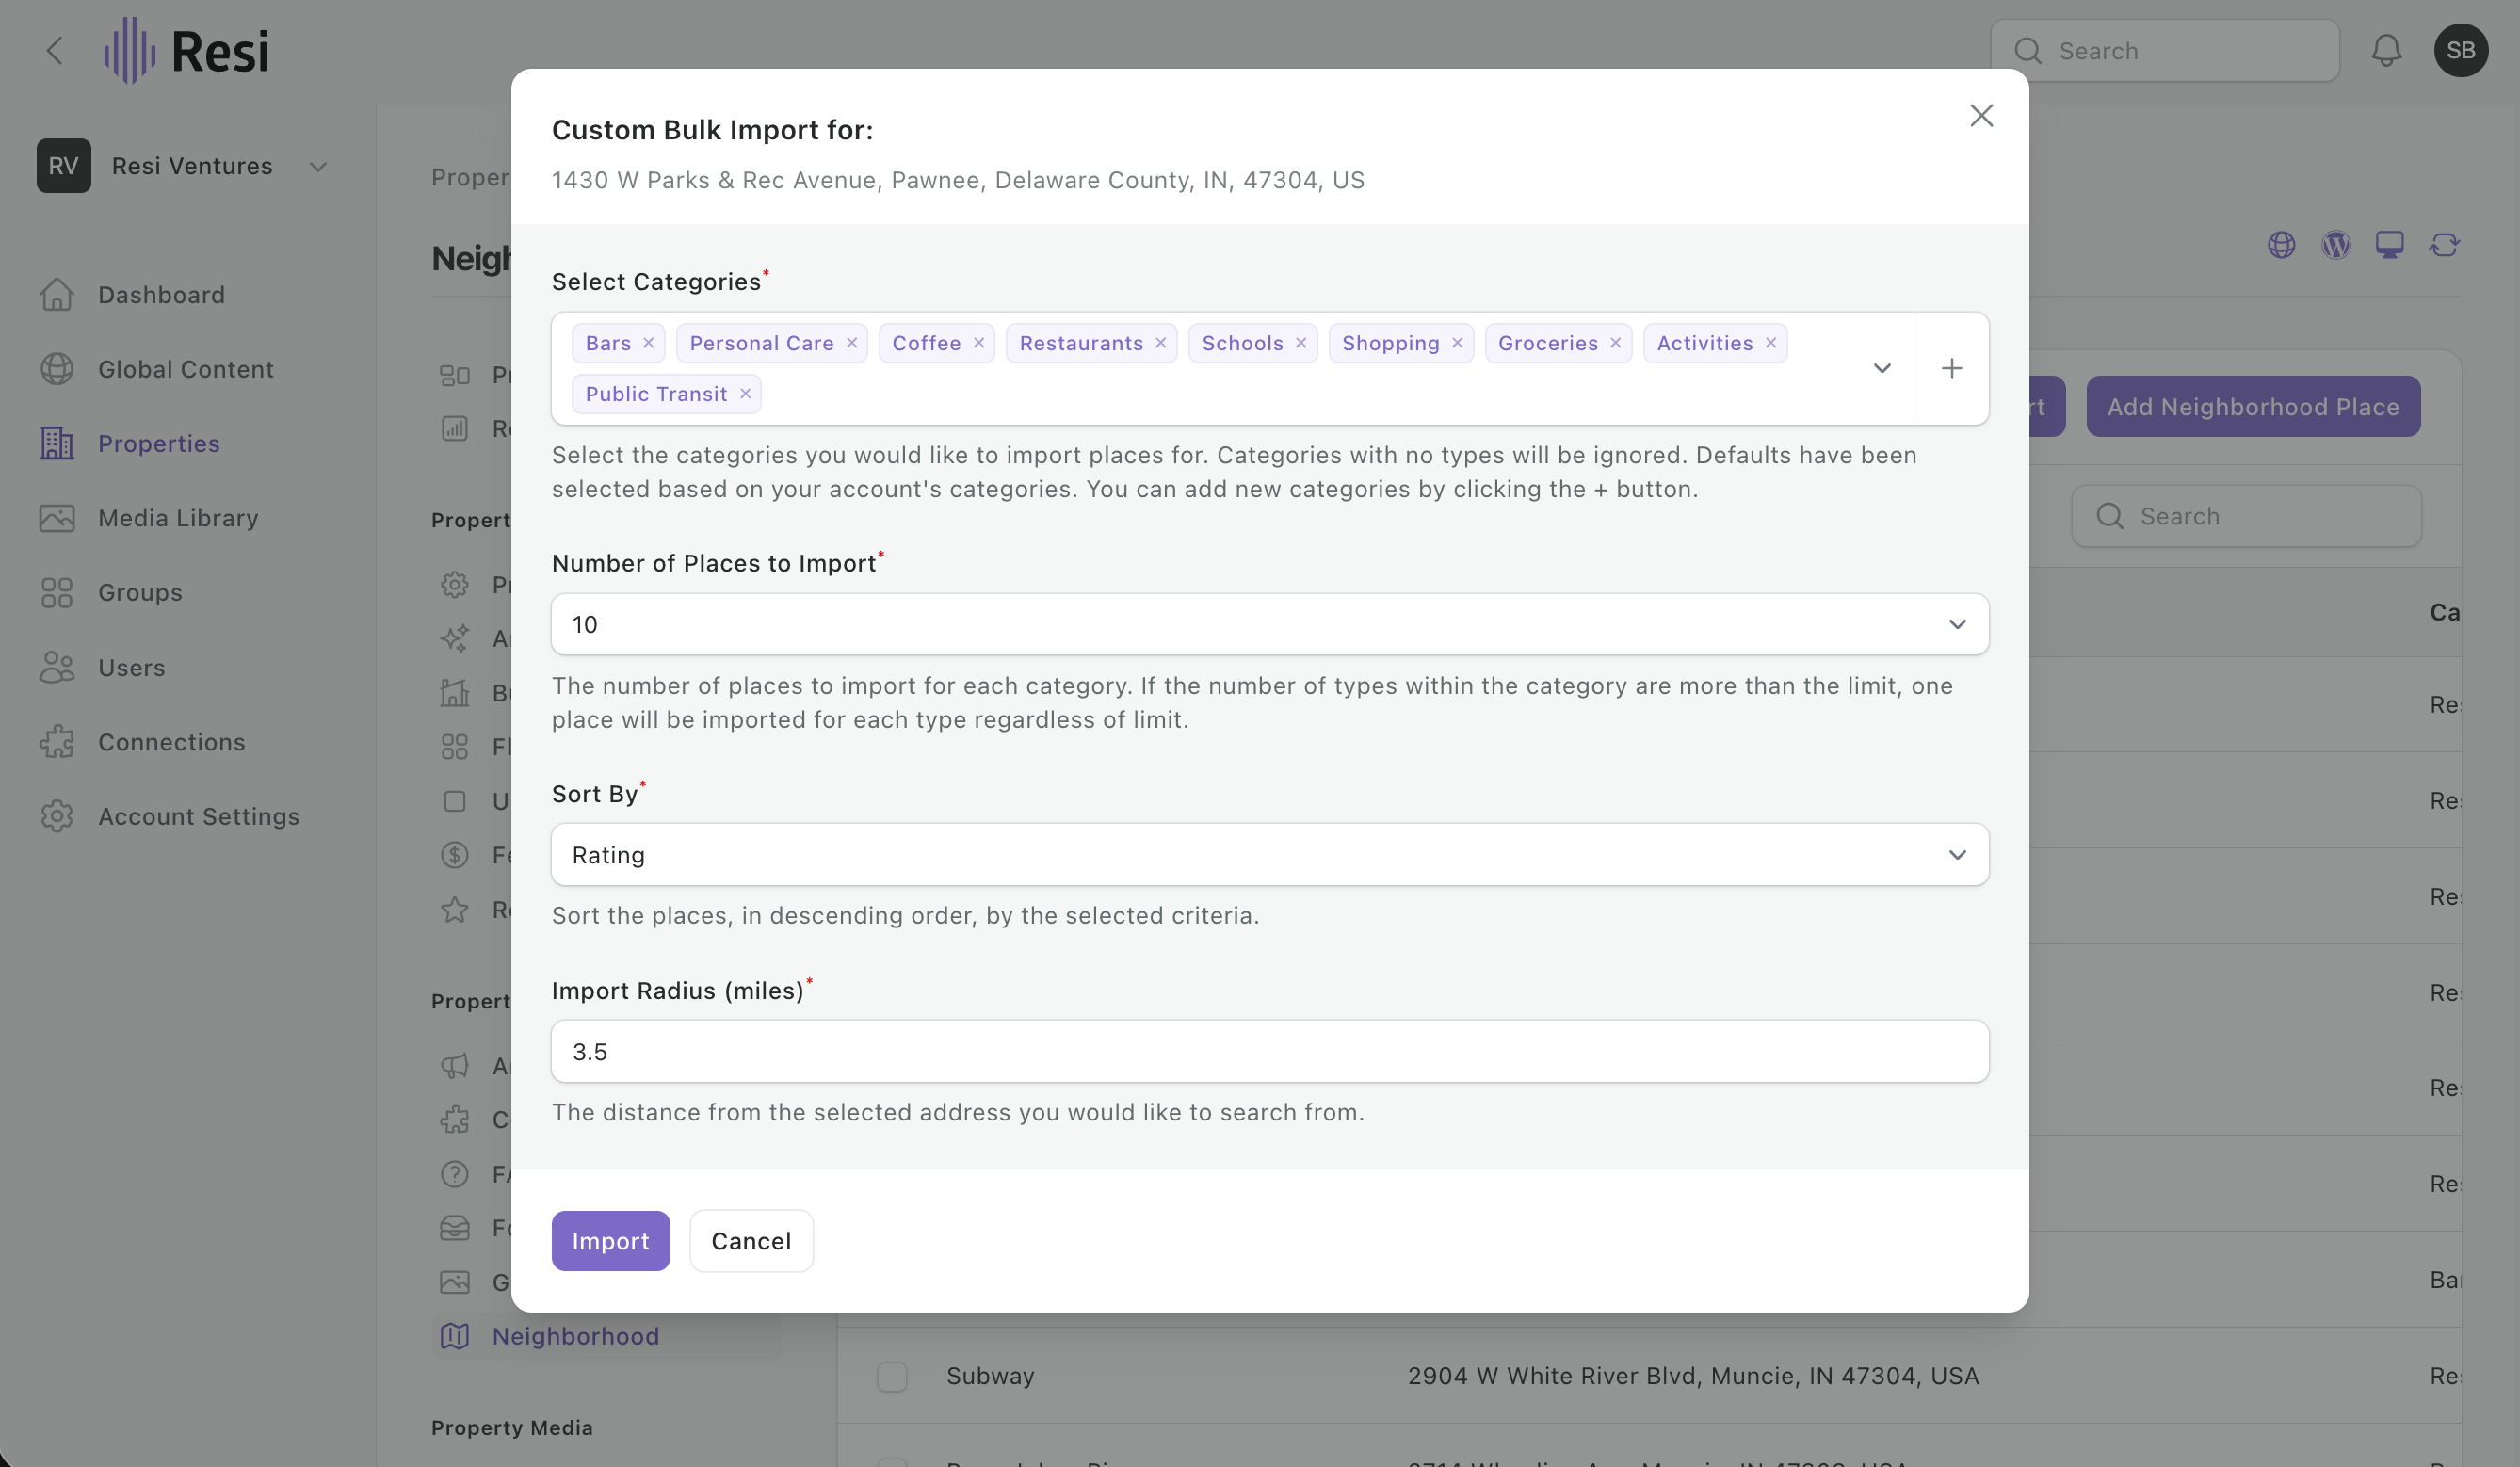
Neighborhood places are the nearby spots shown on your map and lists. You can add them one at a time by searching an address, or fill the whole map in one pass with a bulk import from Google.
One at a time or all at once? Add places individually when you're curating - the coffee shop your residents actually go to, the park across the street. Use the bulk import below to fill an empty map fast, then delete what doesn't fit.
Resi pulls walk times, drive times, websites, and photos from Google, so an imported place arrives ready to show. Edit or remove anything you do not want after the import runs.
Set the radius to the neighborhood. A dense urban property is best served by a short walk-distance radius. A suburban one usually needs a wider net to find enough places worth showing.
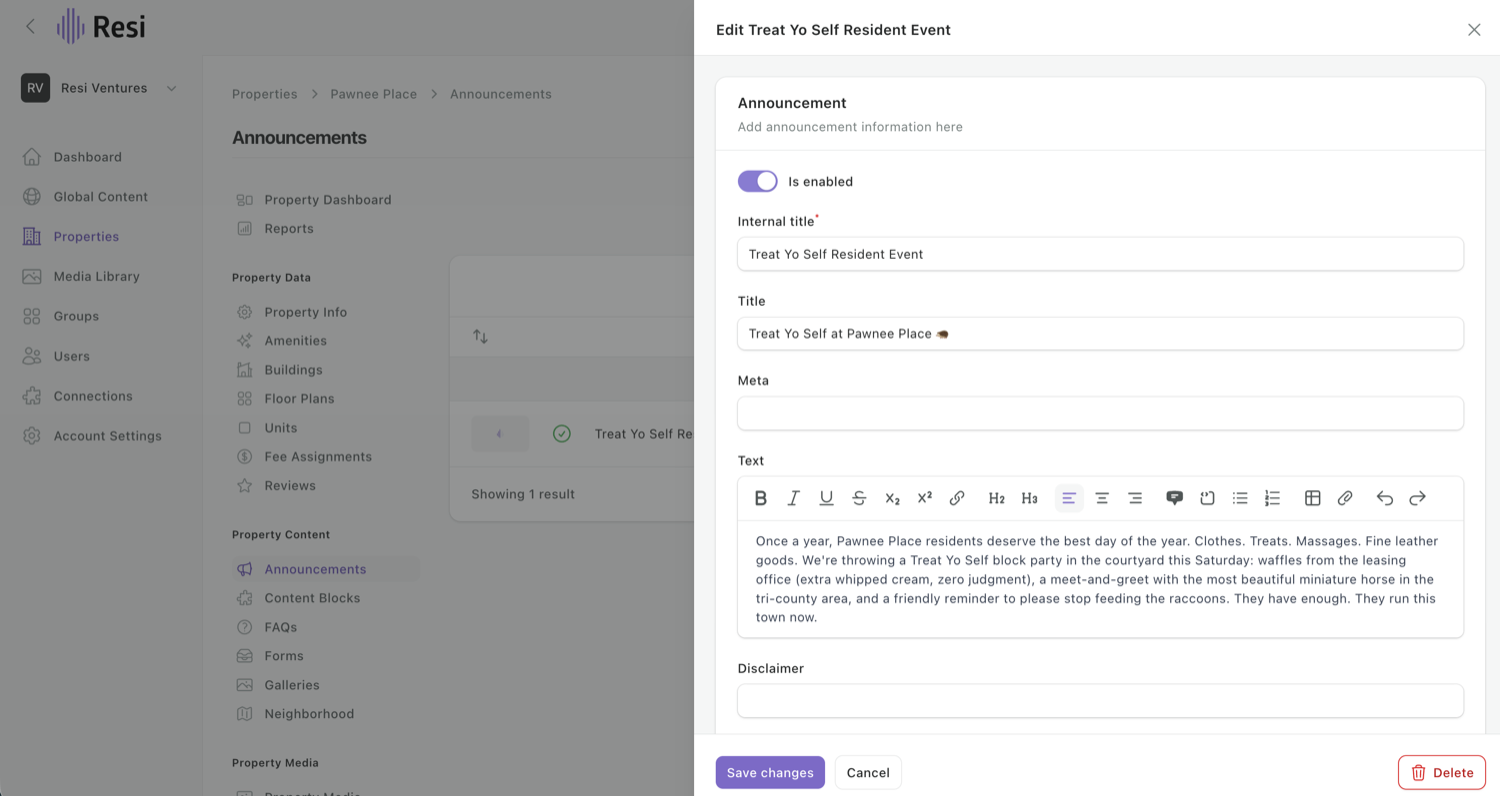
Announcements are timed messages - a special, an event, a leasing note - that appear on your site for a set window.
Managing several properties? Announcements also live under Global Content for reuse across sites. See Shared vs. property content.
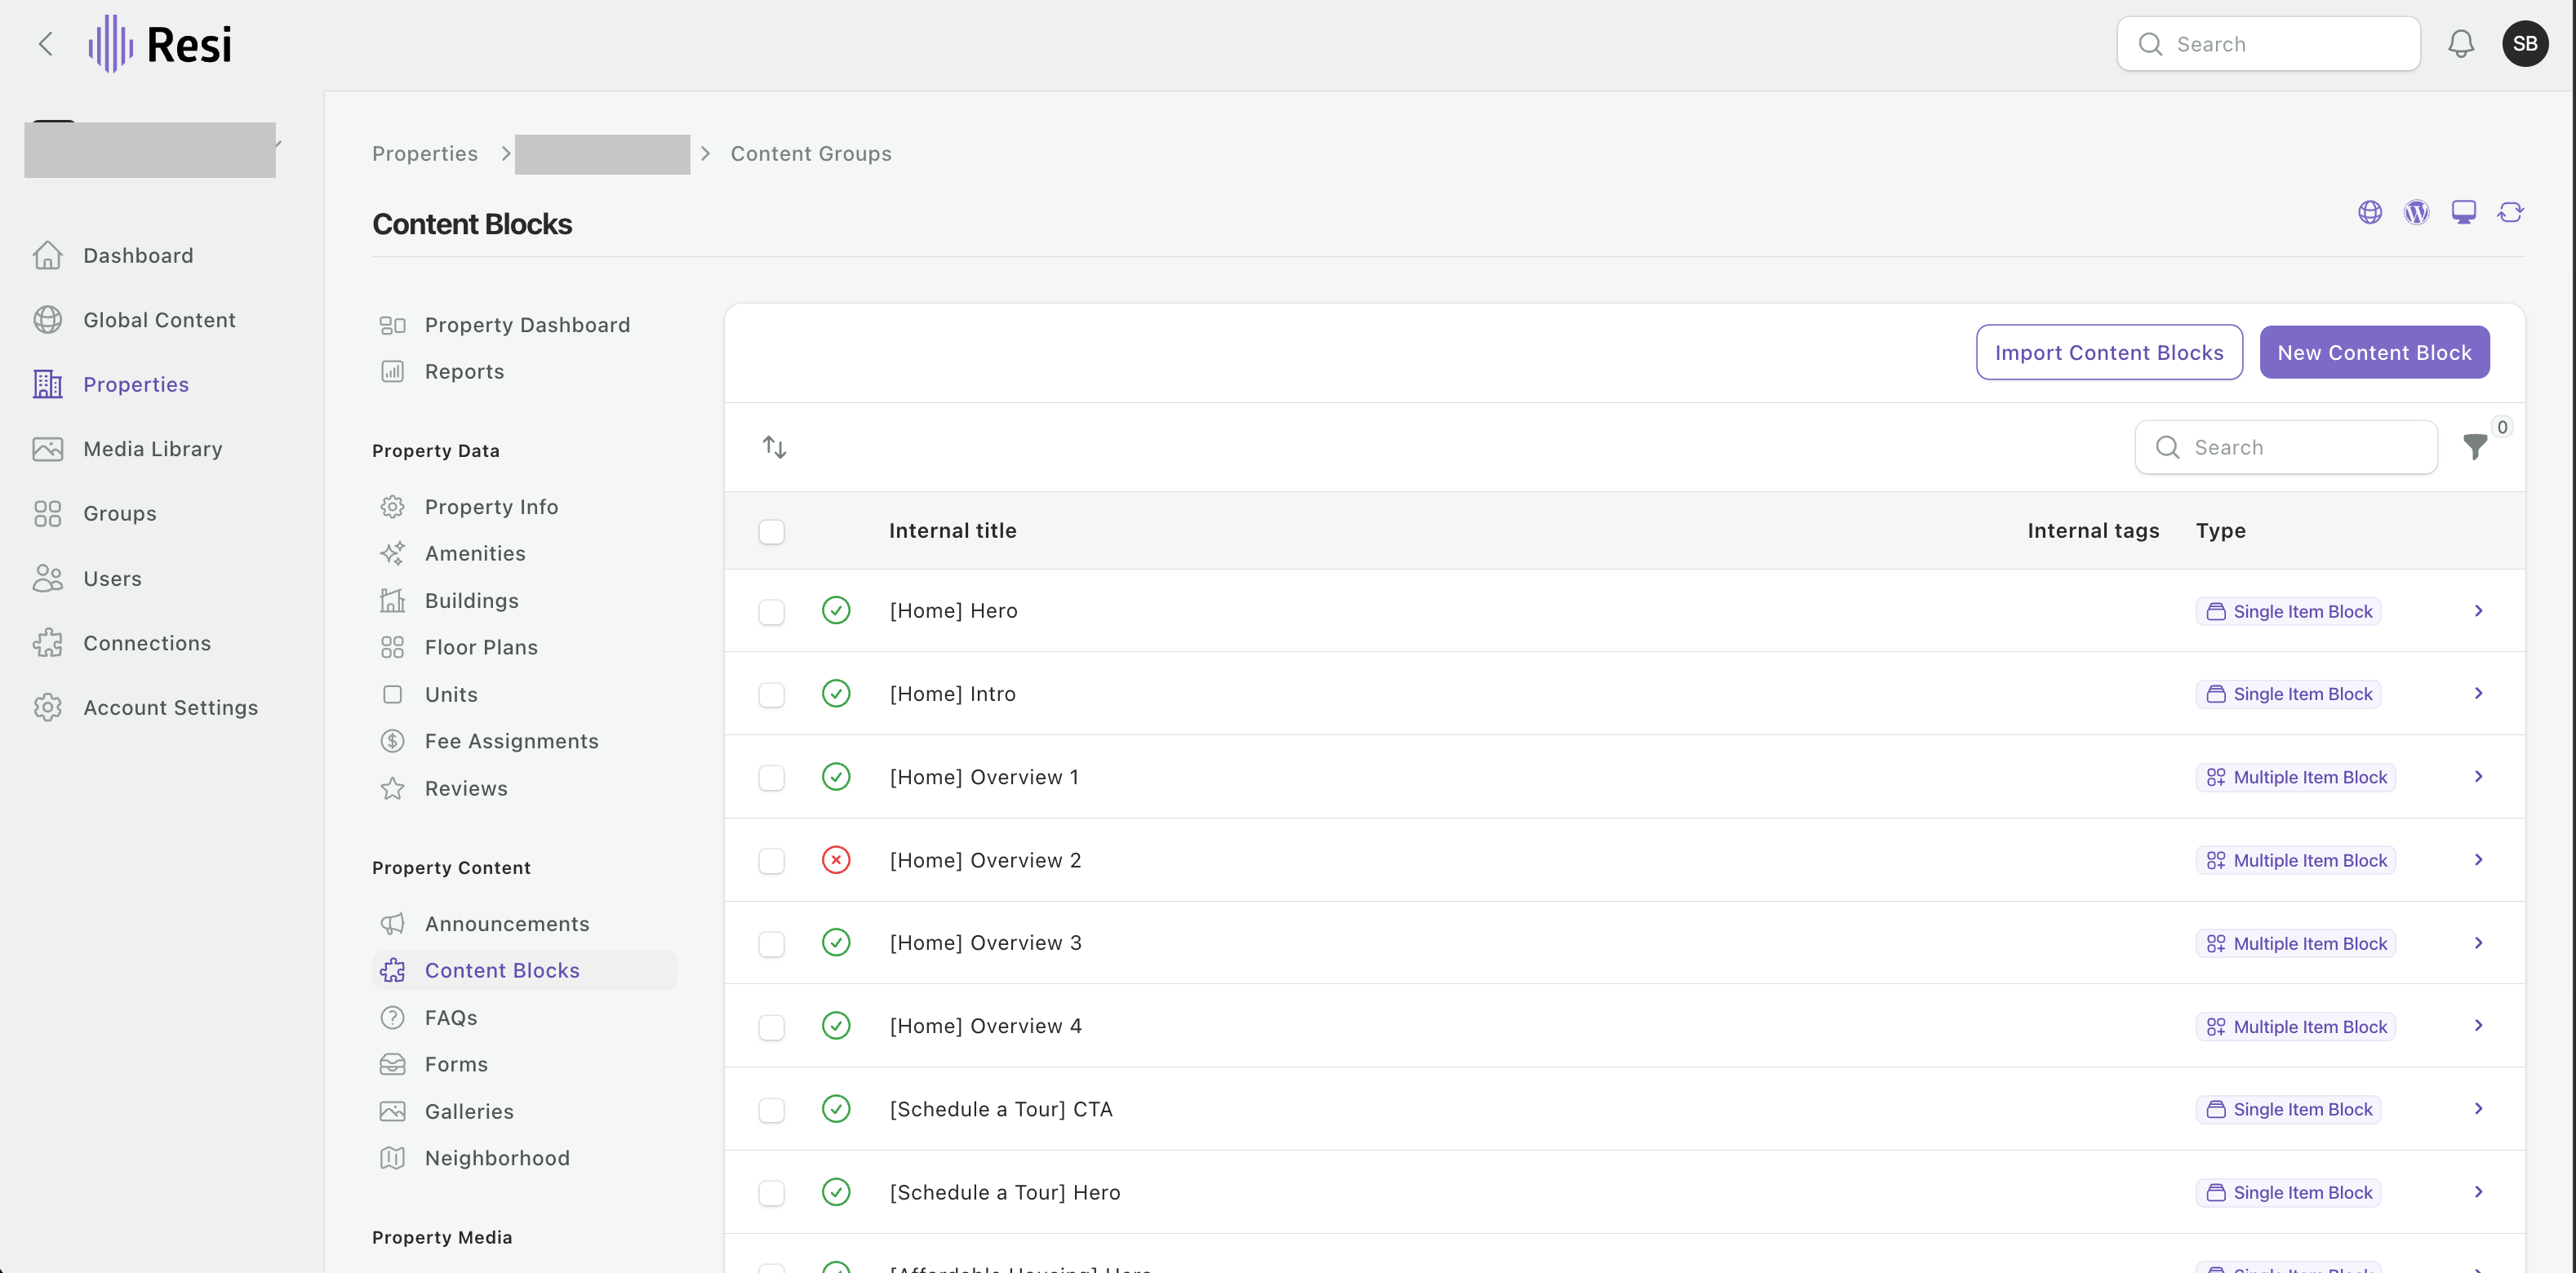
Content blocks are reusable pieces of text (and optional media) - a neighborhood description, a leasing blurb, a policy note. They're used on Resi Theme sites, so depending on how your site was built, you may or may not manage content this way.
Open Properties -> your property -> Property Content -> Content Blocks and look at the list. If blocks are populated there, that's where your copy edits go.
If the list is empty, your site isn't set up with content blocks, and you'd make the majority of your content copy updates directly in the WordPress builder. Amenity lists fed from your PMS, floor plans, and announcements are the usual exceptions - those you still update in Resi.
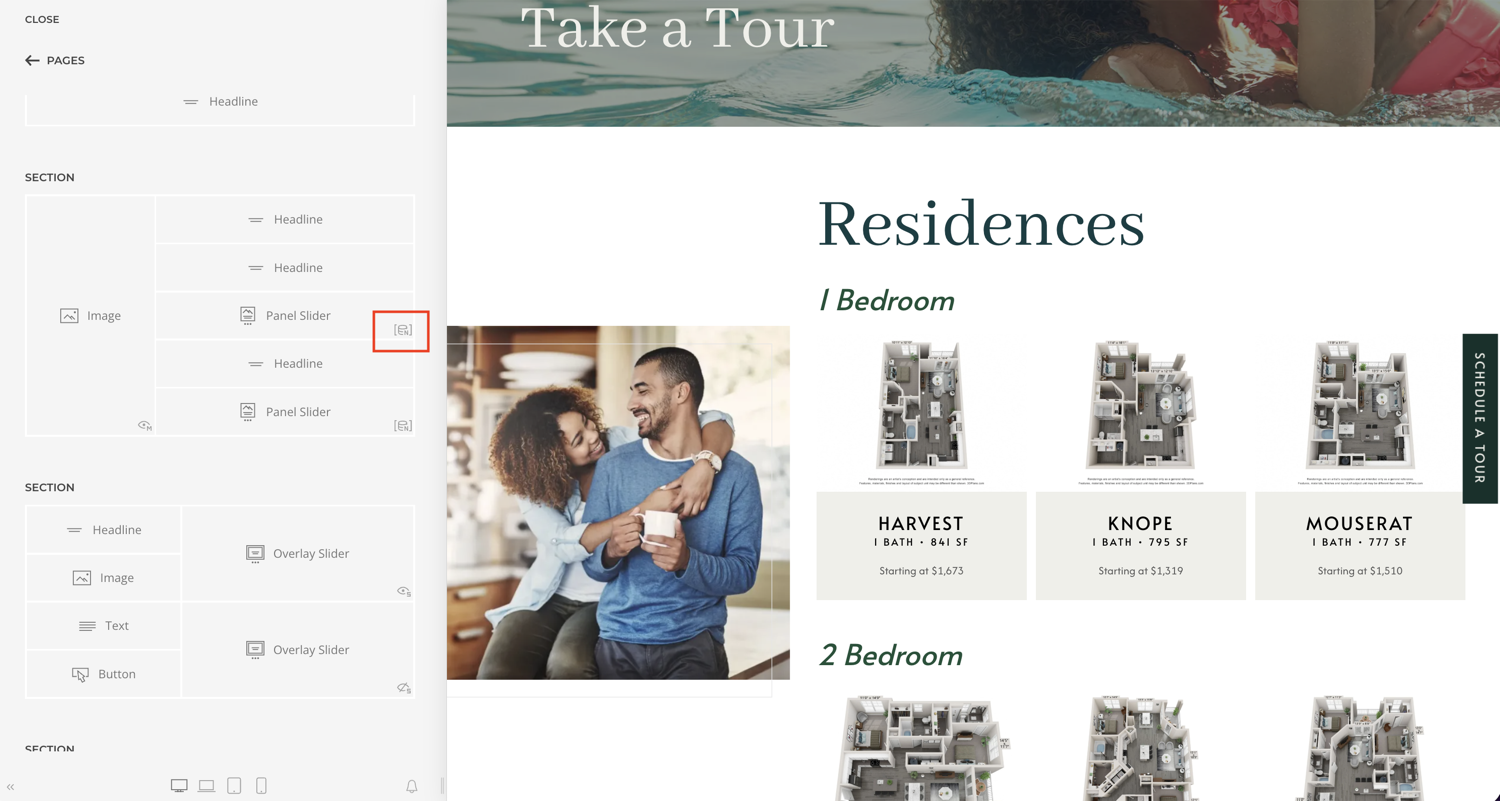
The thing that trips people up is knowing where to make a change. Parts of a page are dynamic - they pull live from your Resi data (units, pricing, content blocks) - and parts are static text typed straight into the page. In the site builder, dynamic sections carry a small indicator:
Change it in Resi - edit the content block, the unit, and so on. Retyping it on the page won't stick, because the page just displays what's in your data.
Edit it right there in the builder. When you're not sure which a spot is, email support and we'll point you to it - it saves a lot of guessing.
Edit existing content - the words, images, and links in a block: do it yourself, anytime, right here.
A brand-new section, or a layout or animation change - send it to support. New sections have to be built and mapped to your site by the Resi team, so they come through a quick request rather than self-serve.
Rule of thumb: stay in Content Blocks for wording and images. The moment you want a whole new section or a design change, that's a support request - we'll build and map it, then you edit its content here like any other block.
Managing several properties? Content blocks also live under Global Content for reuse across sites. See Shared vs. property content.
A tag is a label you put on a piece of content, and your site uses it to decide where that content shows. It's the quiet mechanism behind a lot of "how did it know to put it there?"
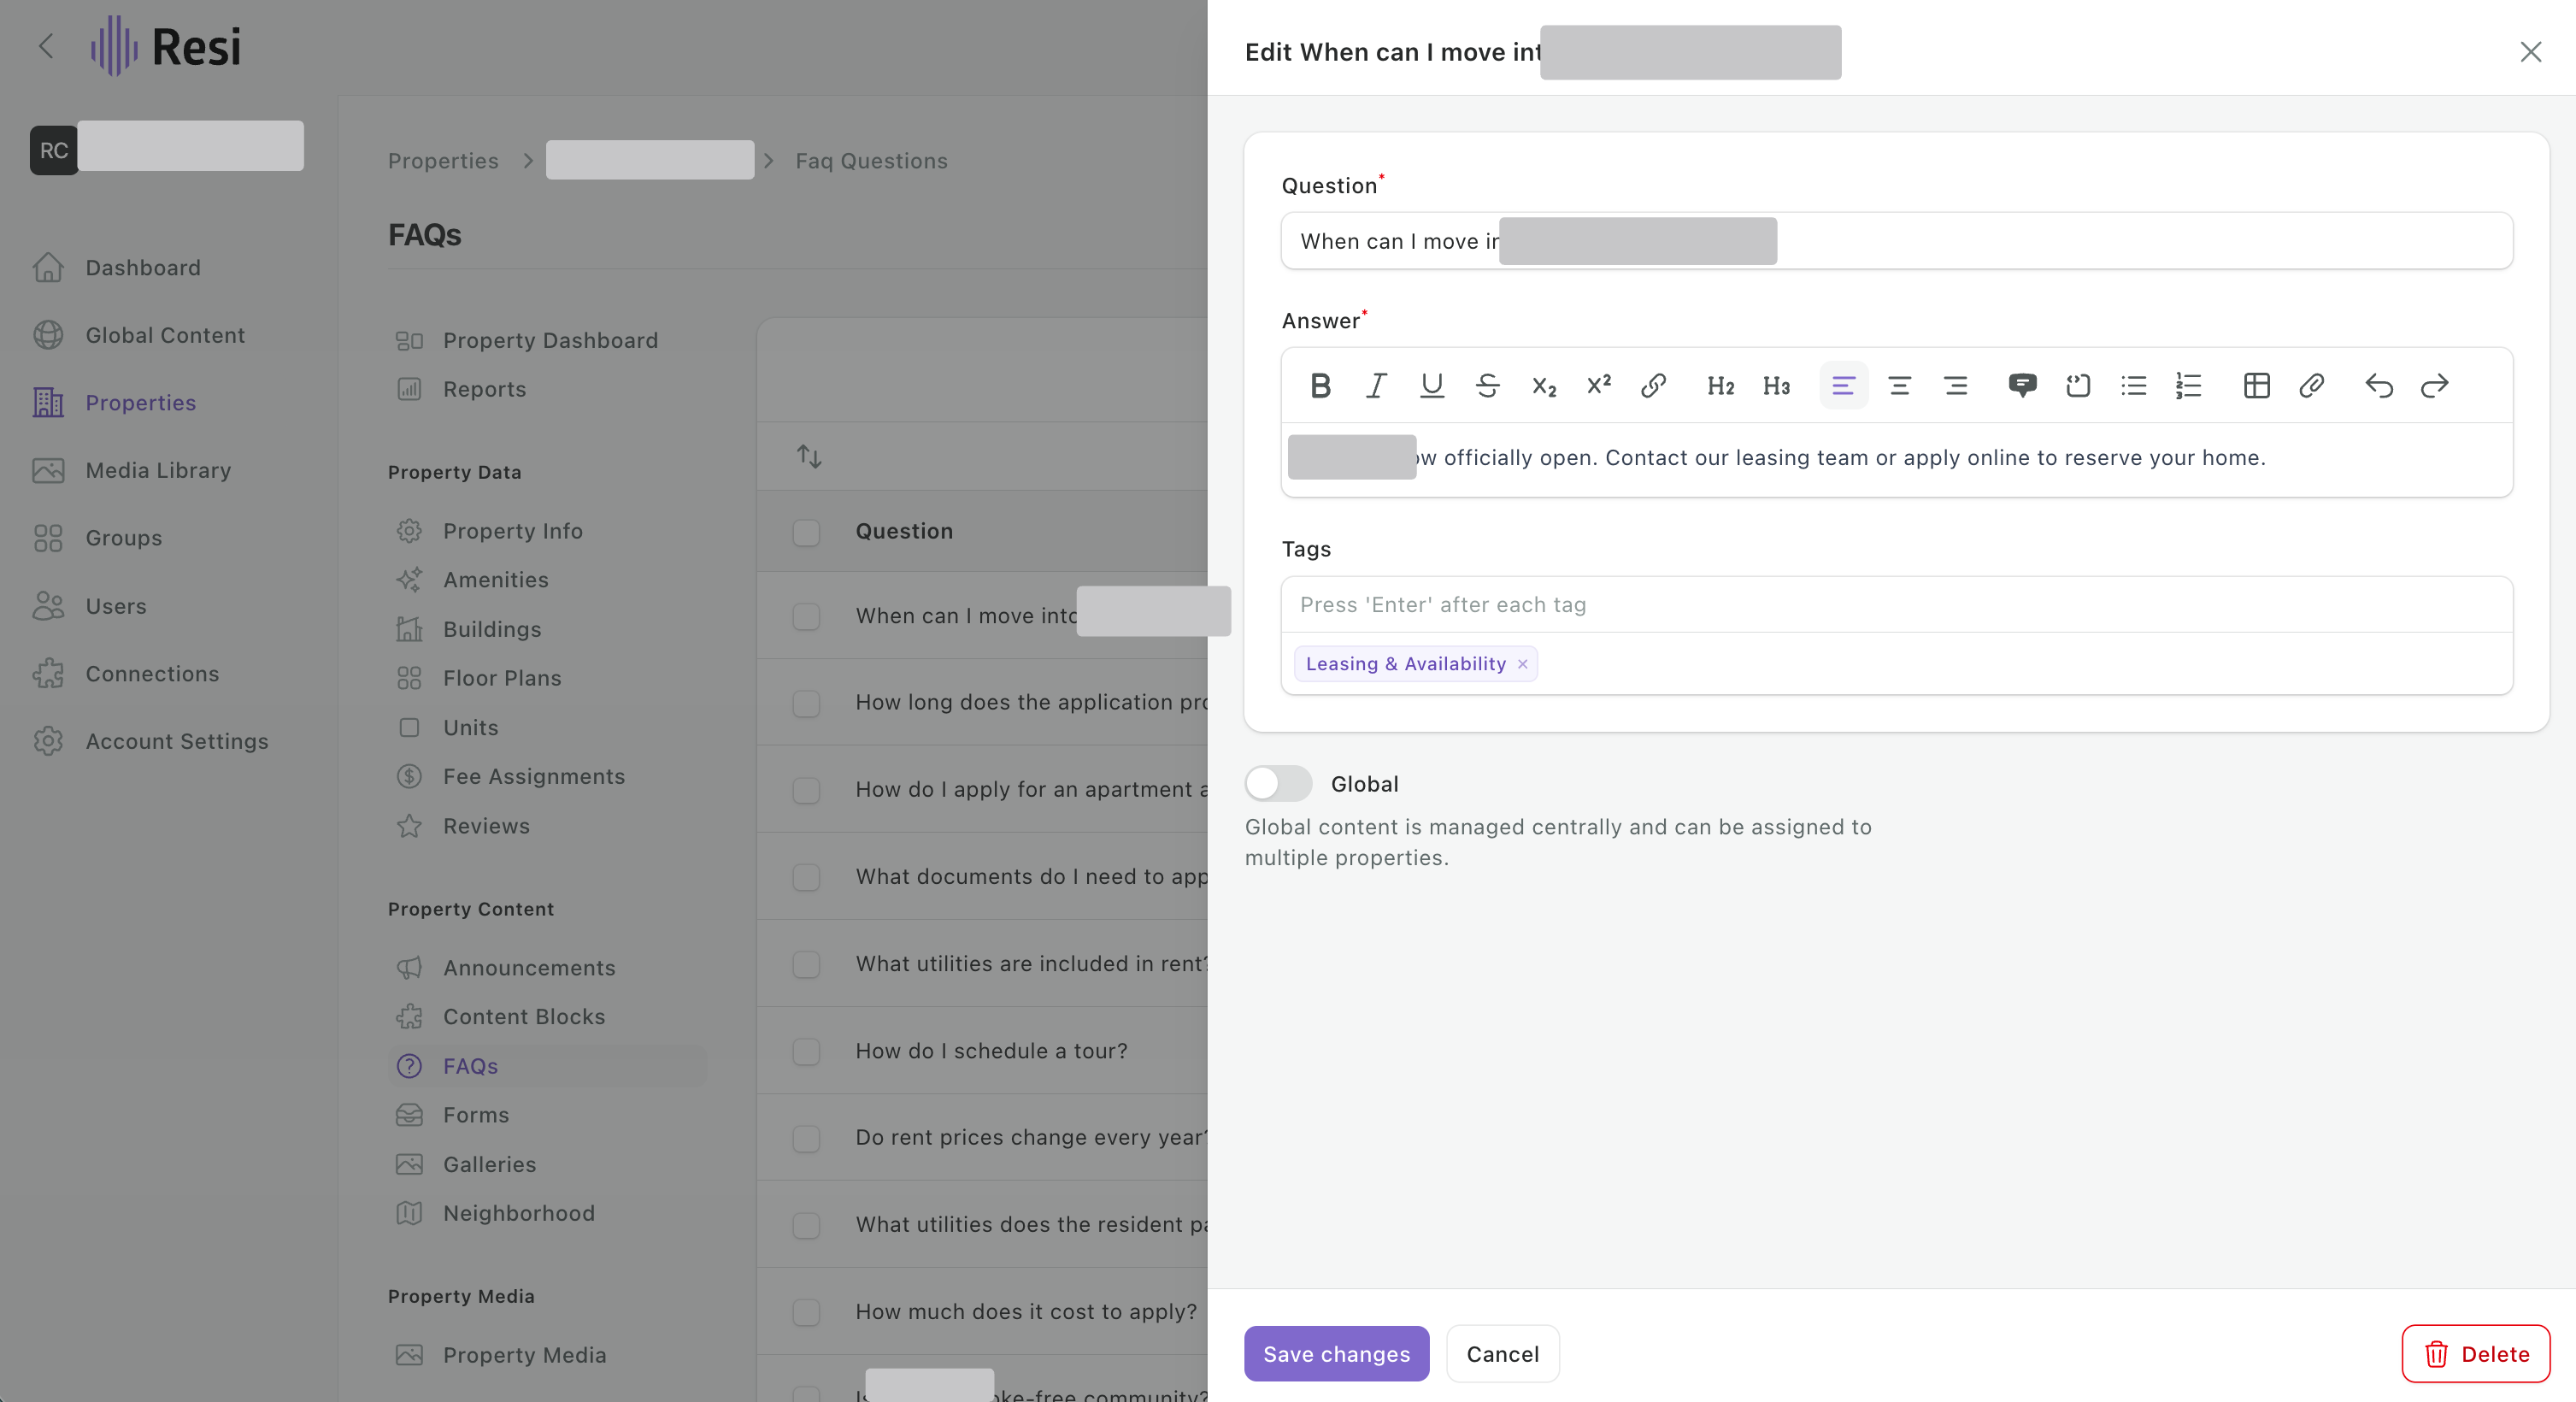
Tags work on almost everything: announcements, content blocks, FAQs, galleries, floor plans, amenities, and units. Your site is built to look for them - a pet policy FAQ tagged pets appears on the pets page, next to where pets are actually discussed, instead of sitting in a long list on an FAQ page.
That means adding to a section is usually a copy job, not a design job. Tag a new item the same way as the ones already in that section and it lands there. No layout change, no ticket.
Open an item that already appears where you want yours to go and copy its tags exactly. A new tag has nothing on the site looking for it, so the item won't appear anywhere.
On lists like floor plans and amenities you can select several rows and tag them in one action, rather than opening each one.
Tag names are internal. Renters never see them, so name them for the place they control. If you want a new tagged section on your site, that part we build - then it's yours to fill.
Nearly everything here syncs from your PMS. What you add in Resi is the richer material your leasing feed doesn't carry: tours, video, and photography.
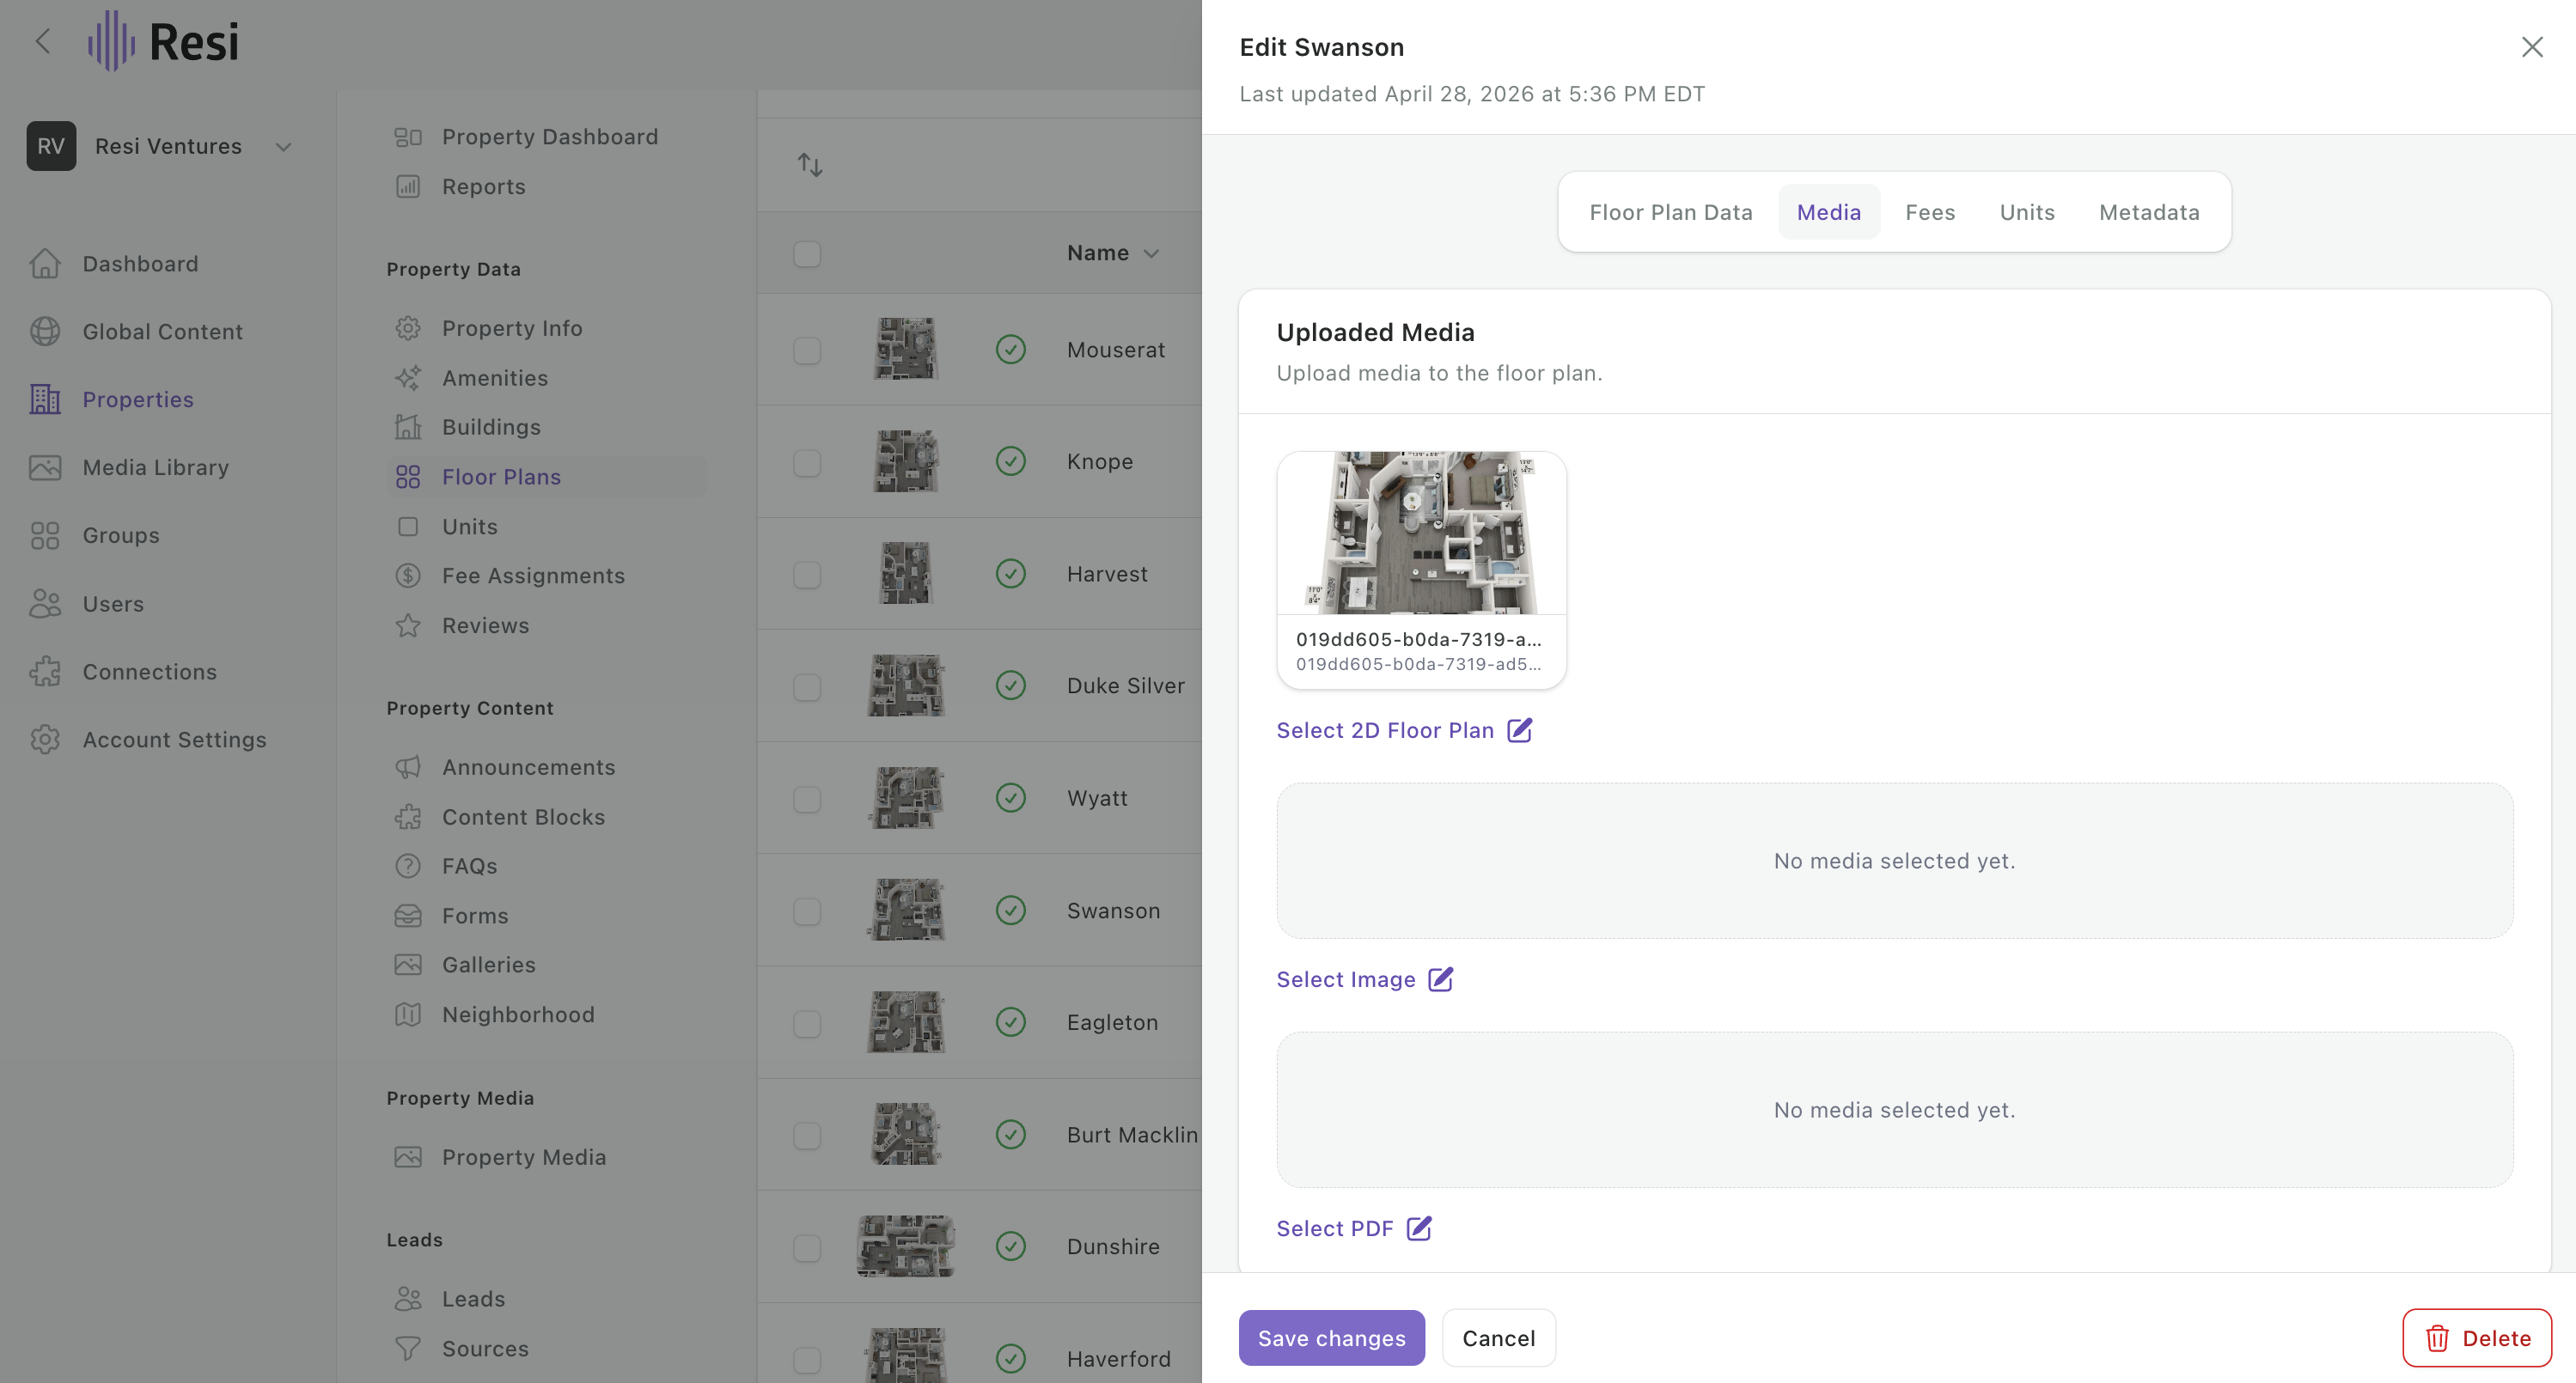
Open a floor plan or an individual unit and add embedded media - a Matterport tour, a YouTube or Vimeo walkthrough, a virtual tour link. Paste the link and it appears with that floor plan or unit on the site.
Unit-level photography works the same way. Most portfolios let units inherit their floor plan's images, but where a specific unit deserves its own shots, you can attach them directly.
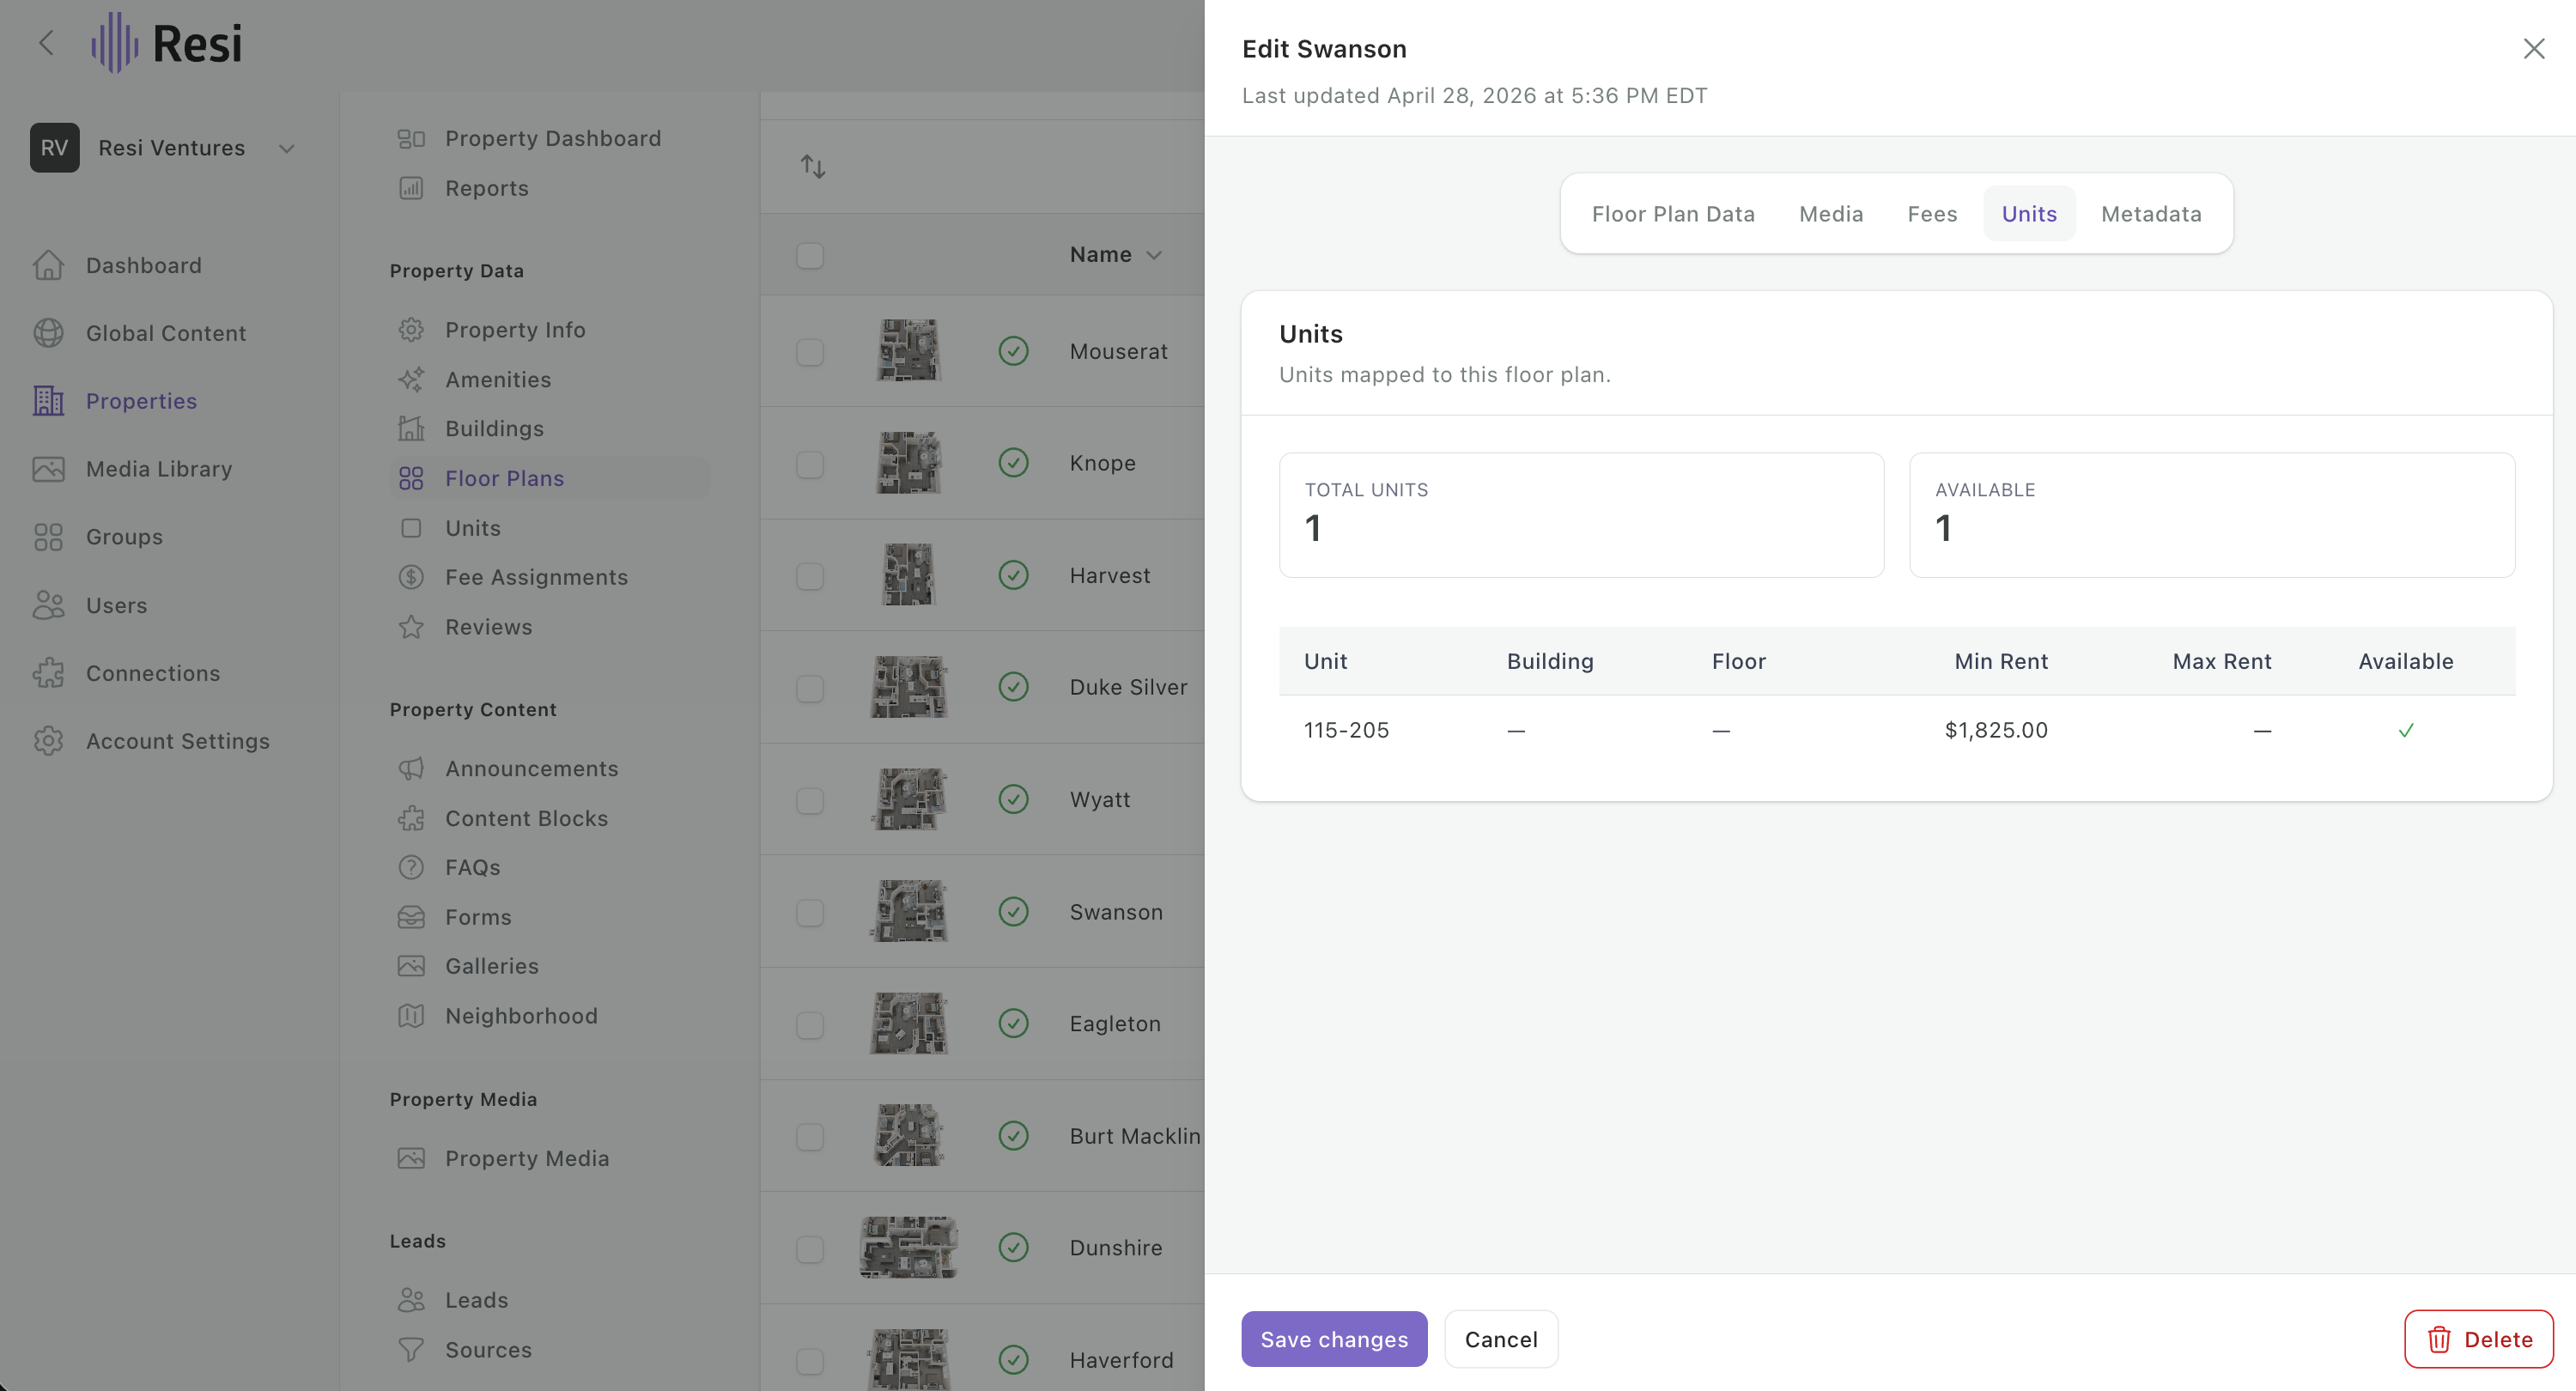
In V1 a floor plan opened in a pop-up over the page. In V2 each one is a real page with its own URL, which means it can be indexed by Google, linked in an email, and shared on its own. You'll also see how many units are mapped to each floor plan and how many are currently available.
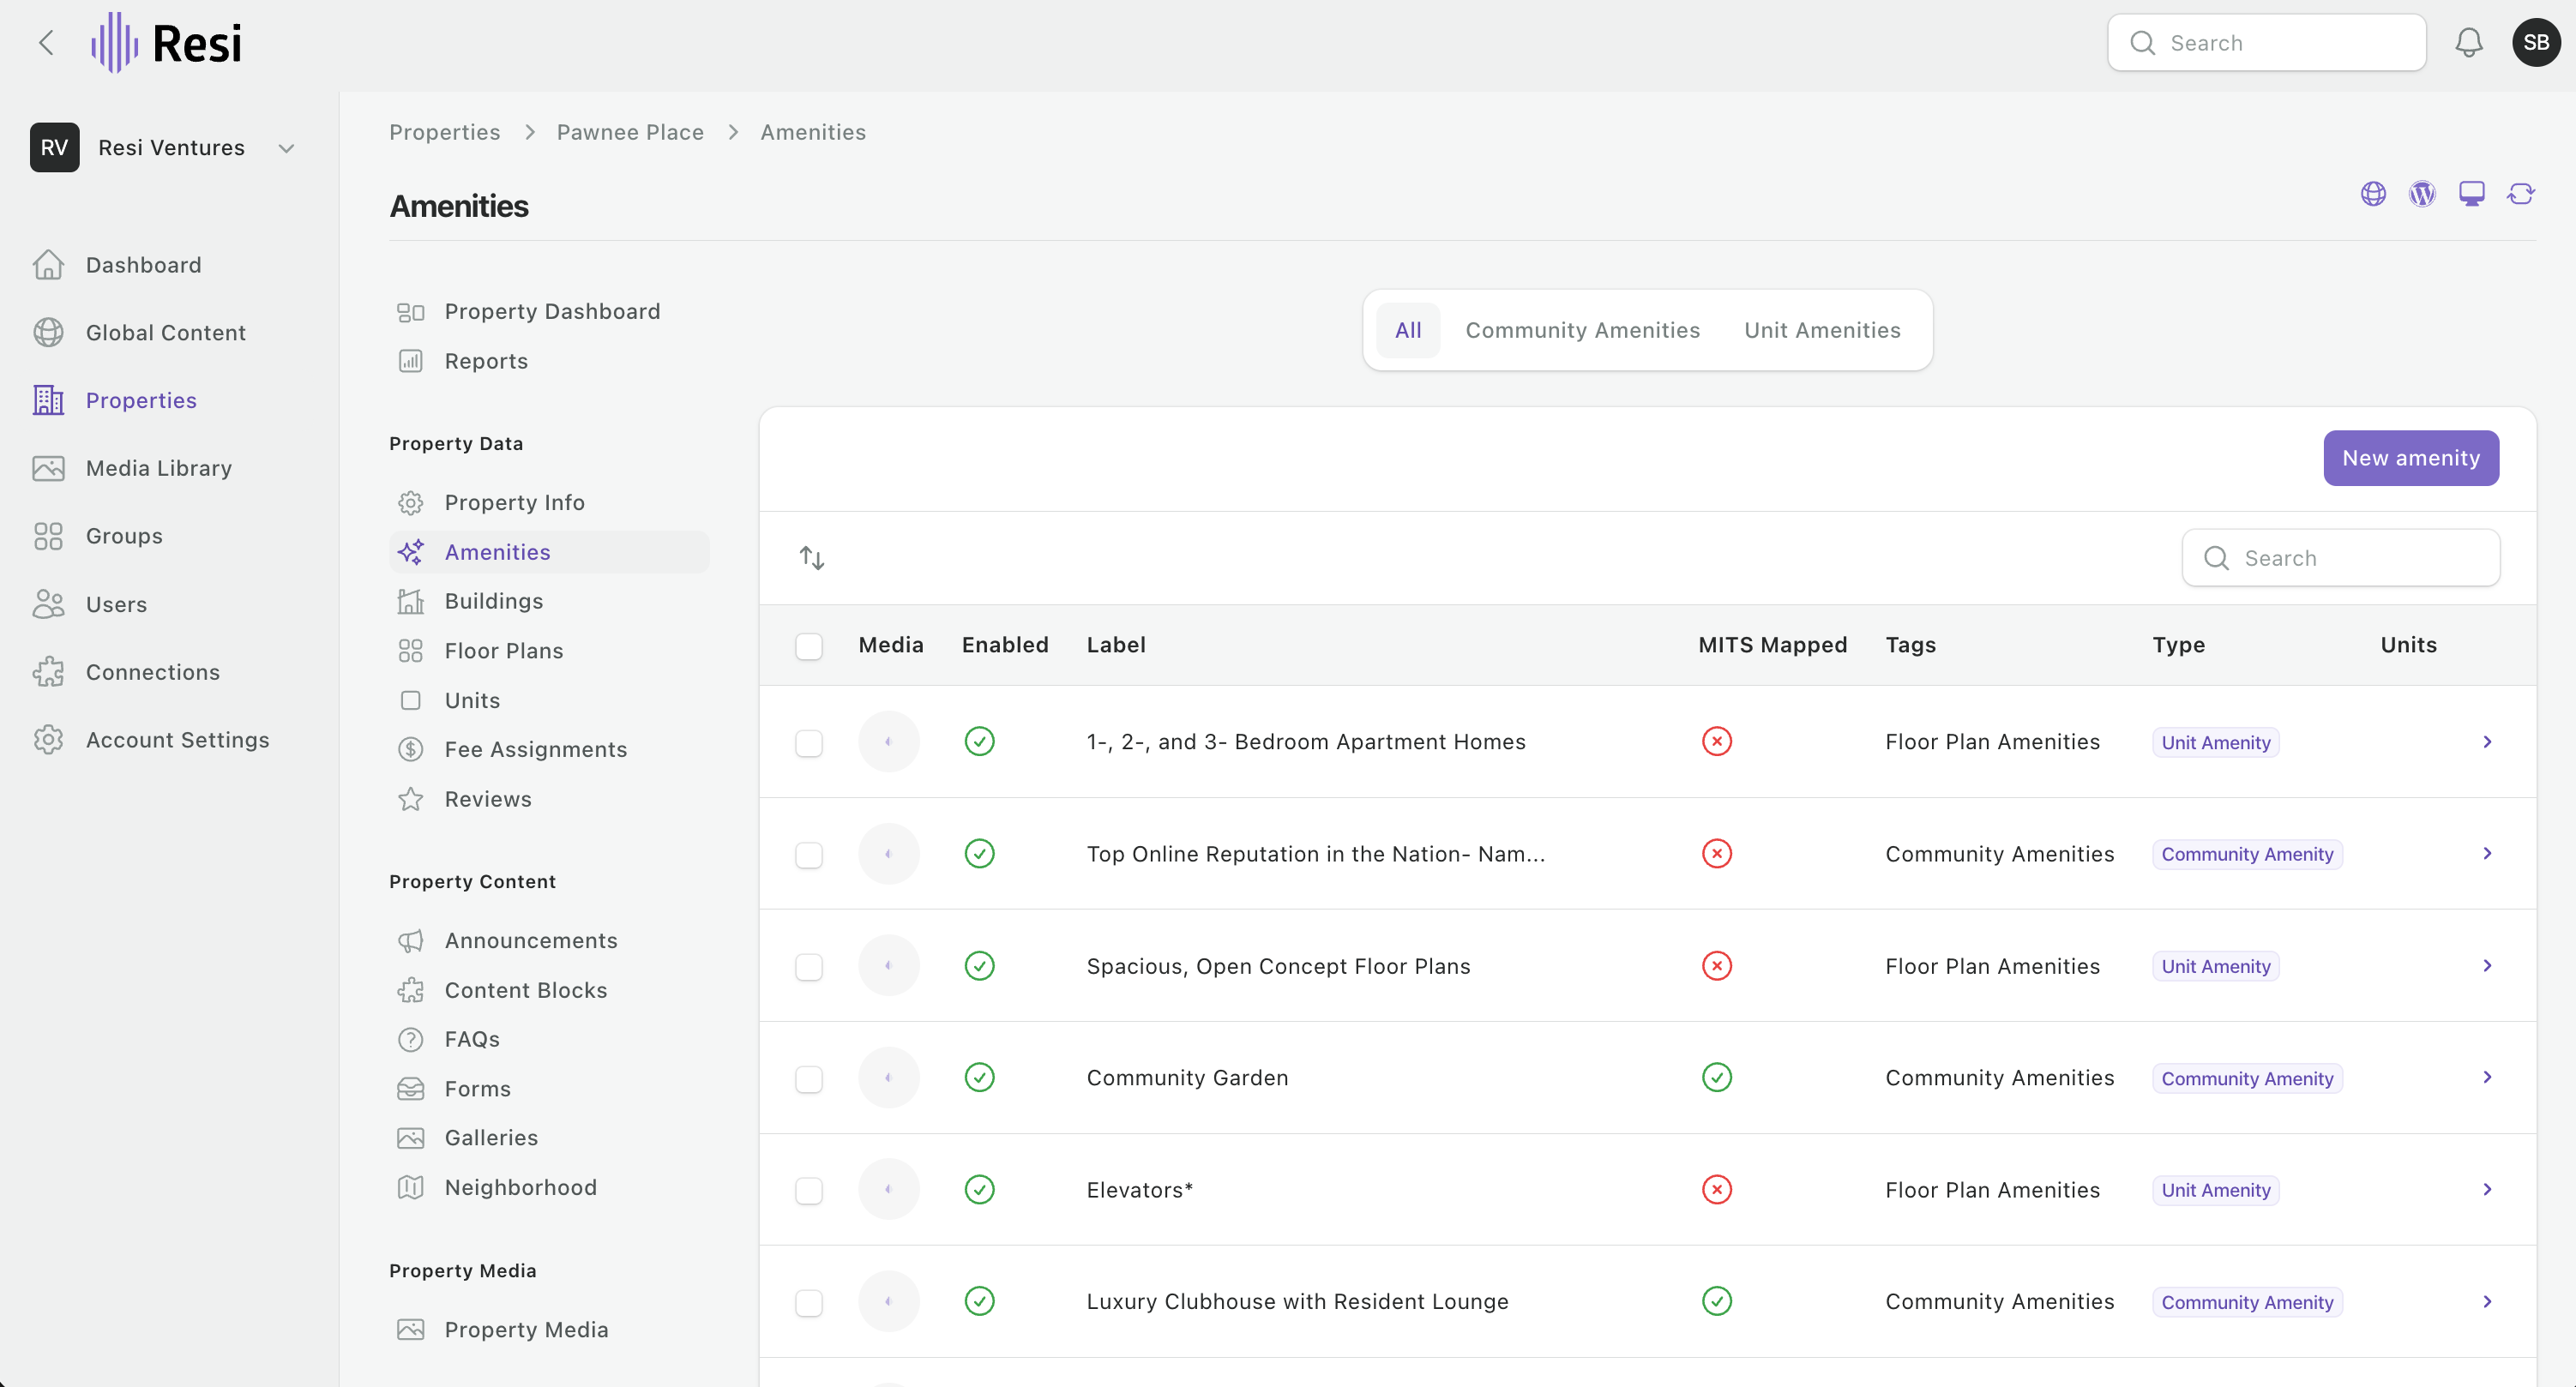
Amenities arrive in two groups, and the difference decides where they show up.
Shared features of the property - pool, fitness center, package room. These appear on your amenities page.
Features of specific homes - fireplace, corner unit, in-unit laundry. These are mapped to the units that have them and appear with the floor plan or unit.
If something odd shows on your amenities page - "first floor", a window view, or the same amenity listed twice - it's almost always an amenity marked non-marketable in your PMS that came through anyway, or a unit-level amenity landing in the community list. Send us the property and the amenity; it's a settings alignment on our end, not something you need to work around.
Your units, pricing, and availability come straight from your leasing feed (your PMS), not from manual edits. A unit shows on your site when its feed says it's available or coming available soon.
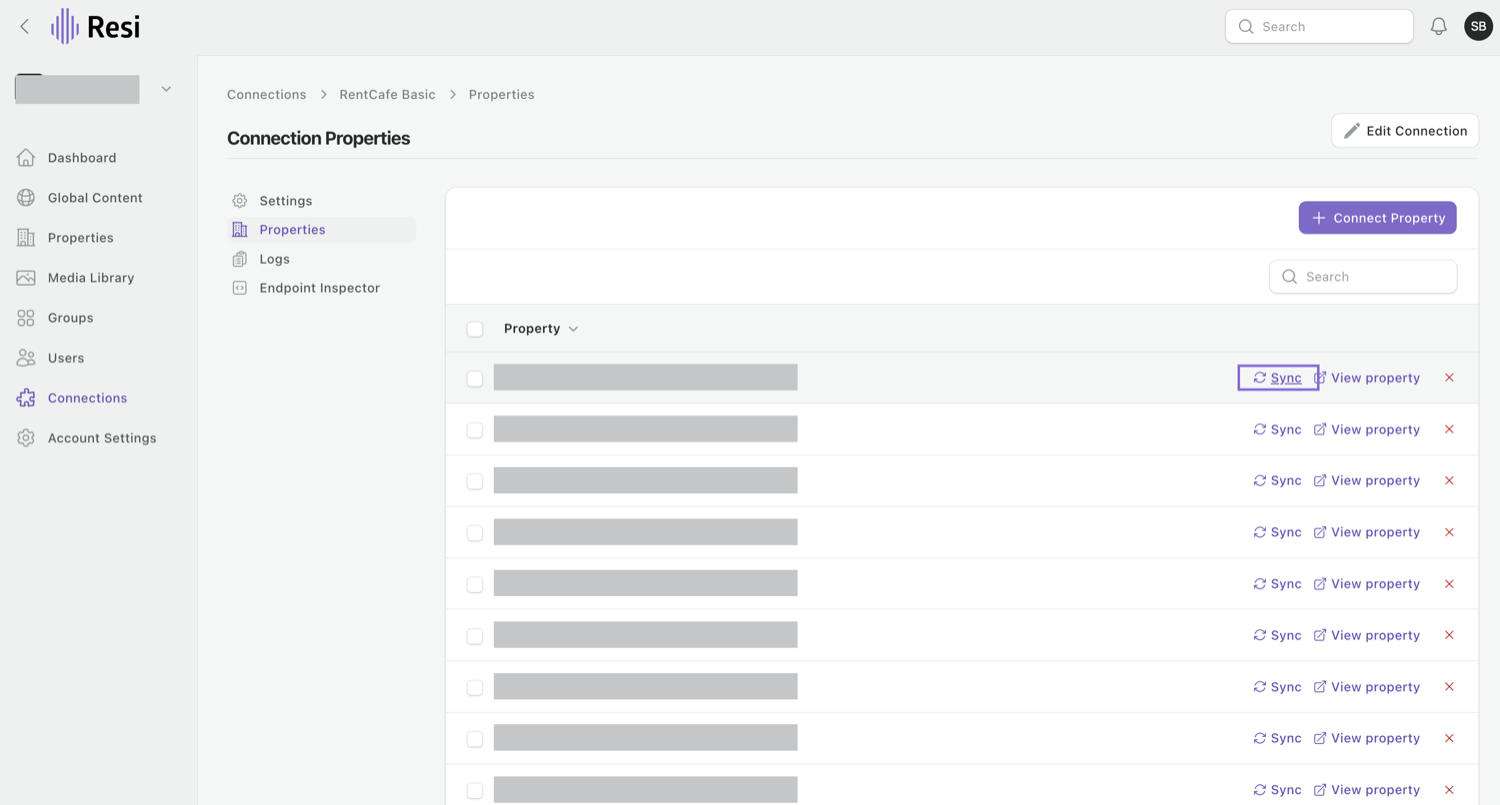
If a unit isn't showing when you expect it - or its pricing looks out of date - the fix is almost always to re-sync the connection, which pulls the latest data from your PMS.
Still not right after syncing? A unit's available date in your PMS is what drives it - if that date is missing or in the future, the unit won't show yet. Check it in your PMS, or reach out to support (see Getting help).
Floor plans show a min and max base rent and a min and max total. Total is inclusive of the fees being displayed, so it's the number a renter sees.
Occasionally you may want to hide a unit even though the feed would show it. On the unit, the Hidden toggle keeps it off the website, and Model marks it as a model or tour unit rather than a rentable listing.
Your PMS connection runs on a schedule you control - every three hours is typical. You can change the interval, and you can always run a sync by hand without waiting for the next one.
If your team approves pricing at a set time each morning, it's worth lining the schedule up with that. A sync that lands 30 minutes after approval gets today's rates onto the site before the first tours; one that lands 30 minutes before shows yesterday's all day.
A PMS sync clears your site cache for you. One to two minutes after it finishes, the new data is live everywhere. Changes you make by hand in Resi don't trigger that, so use Refresh site data for those - see Pushing changes live.
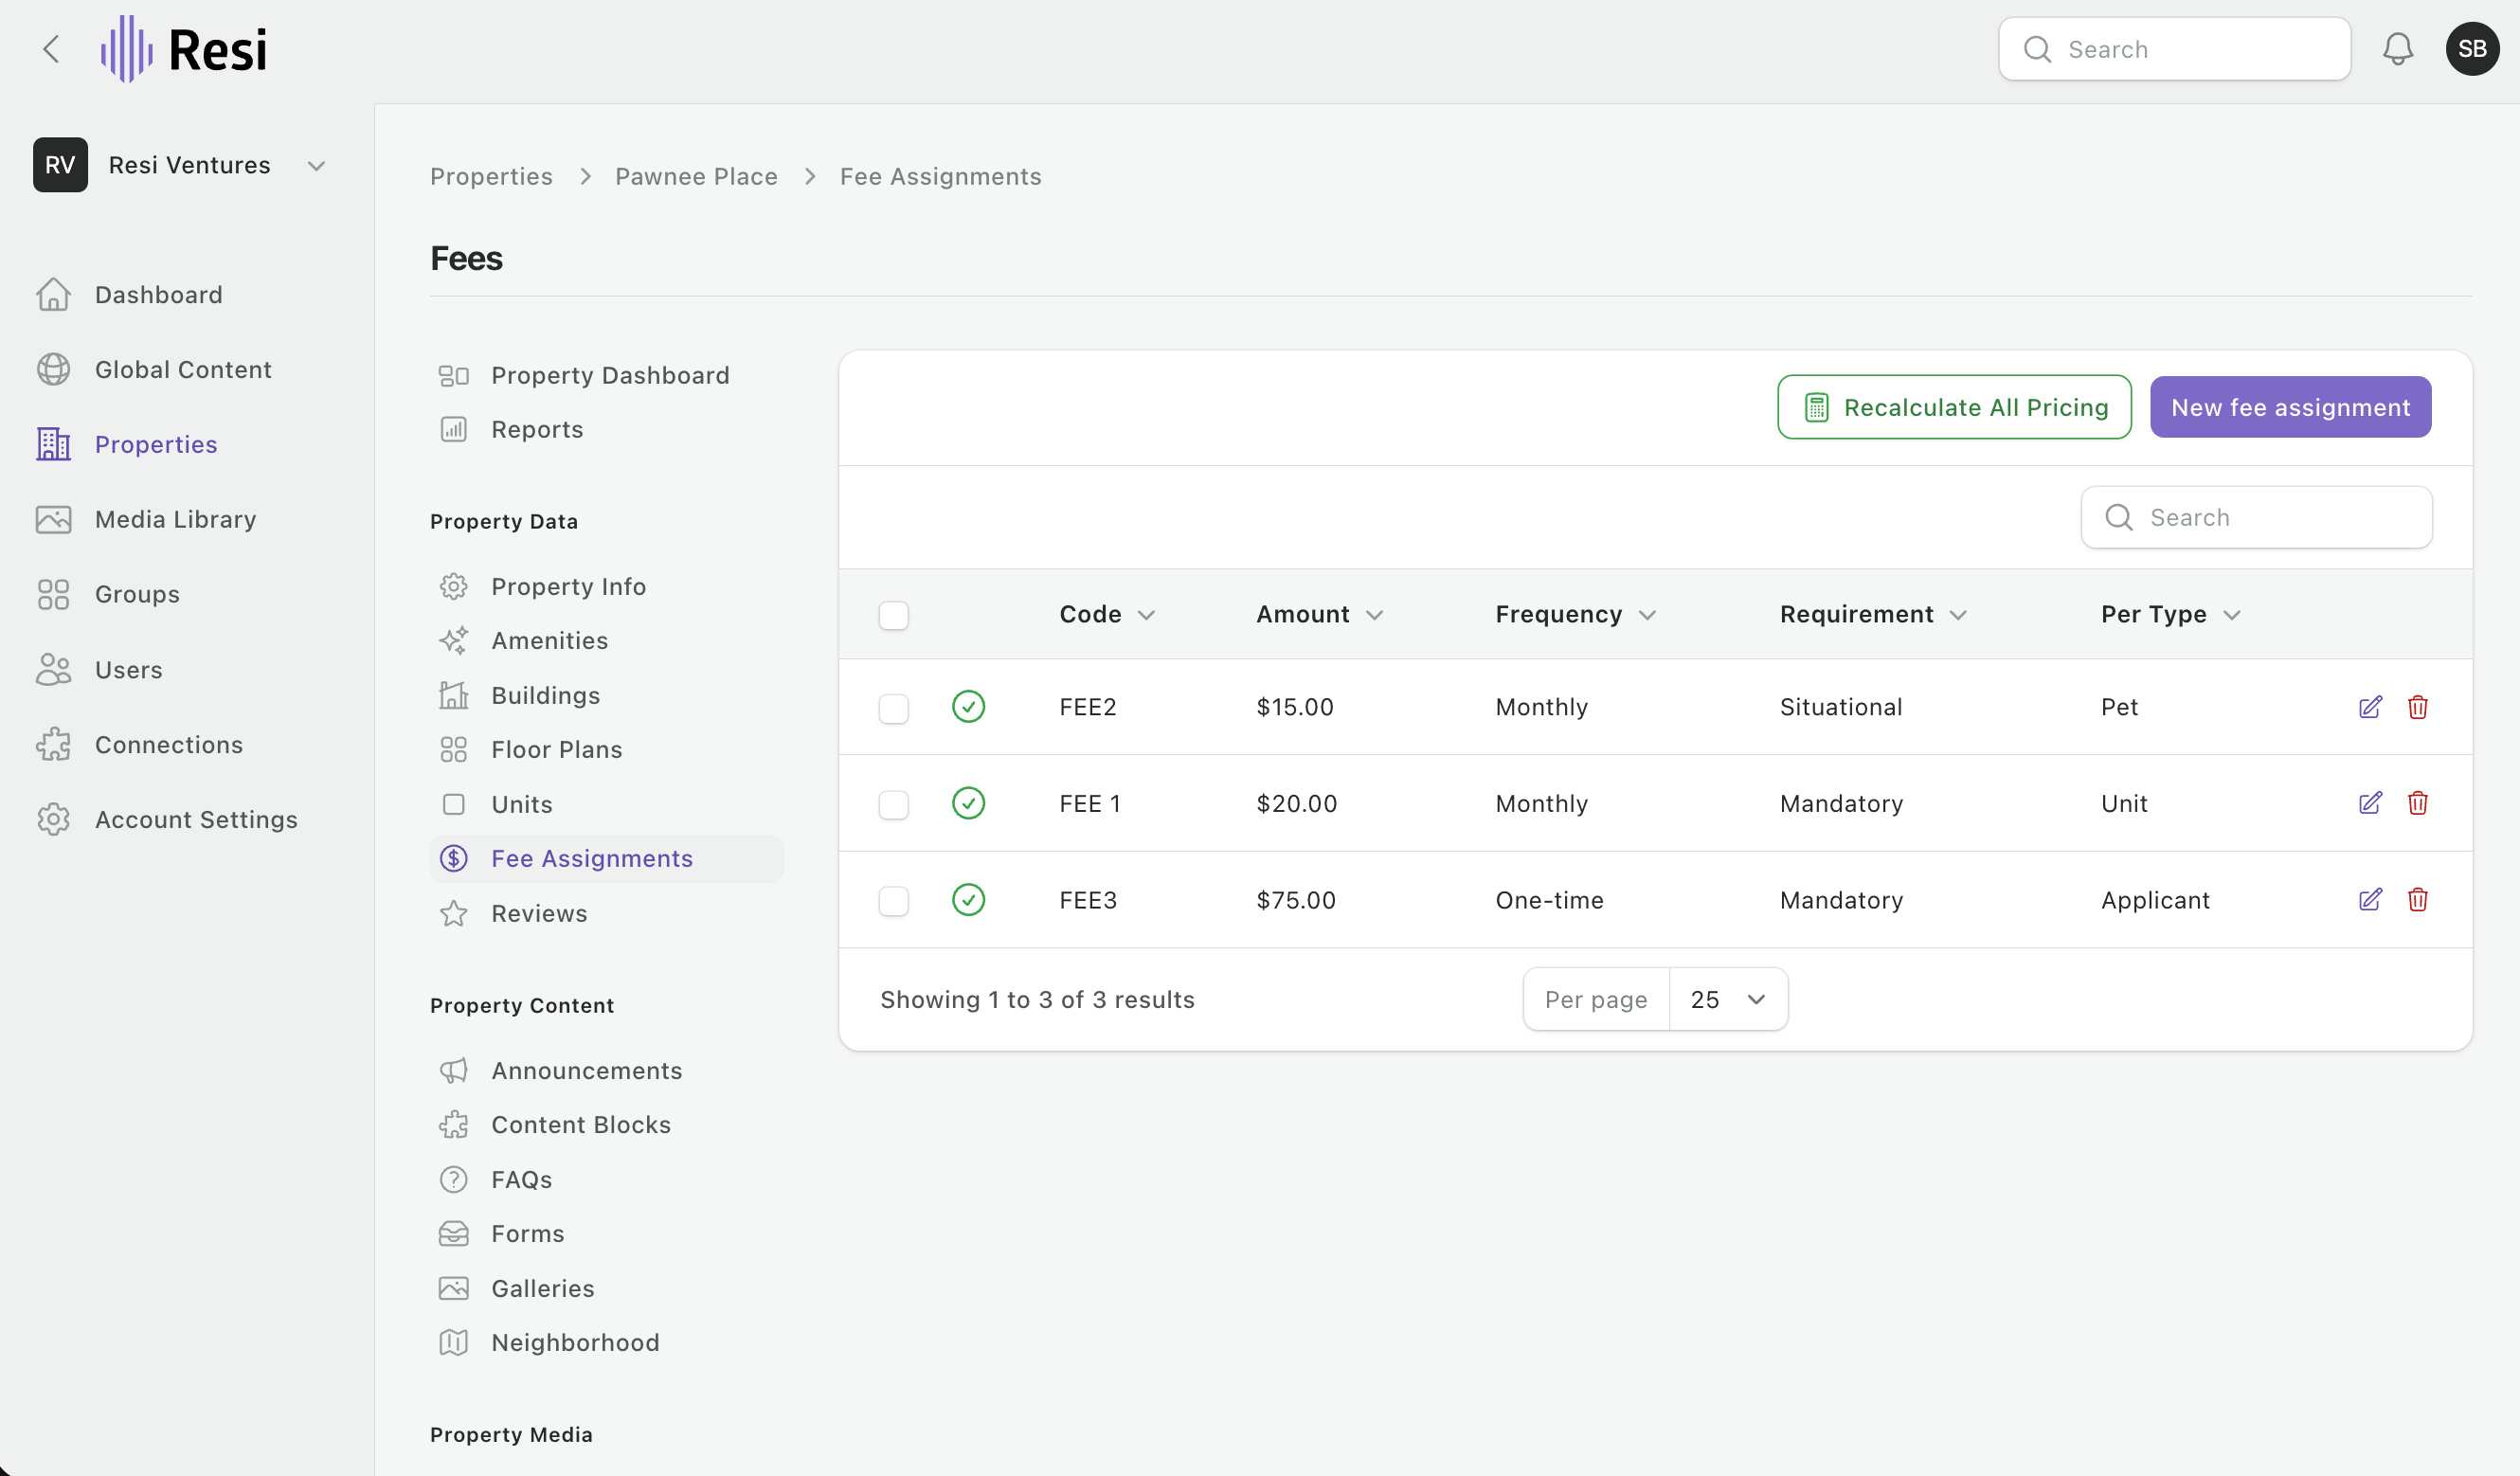
A fee is created once and then assigned to the properties it applies to, so a change in one place carries everywhere it is used. On a property, Fee Assignments shows what is attached and lets you override the amount for that property alone.
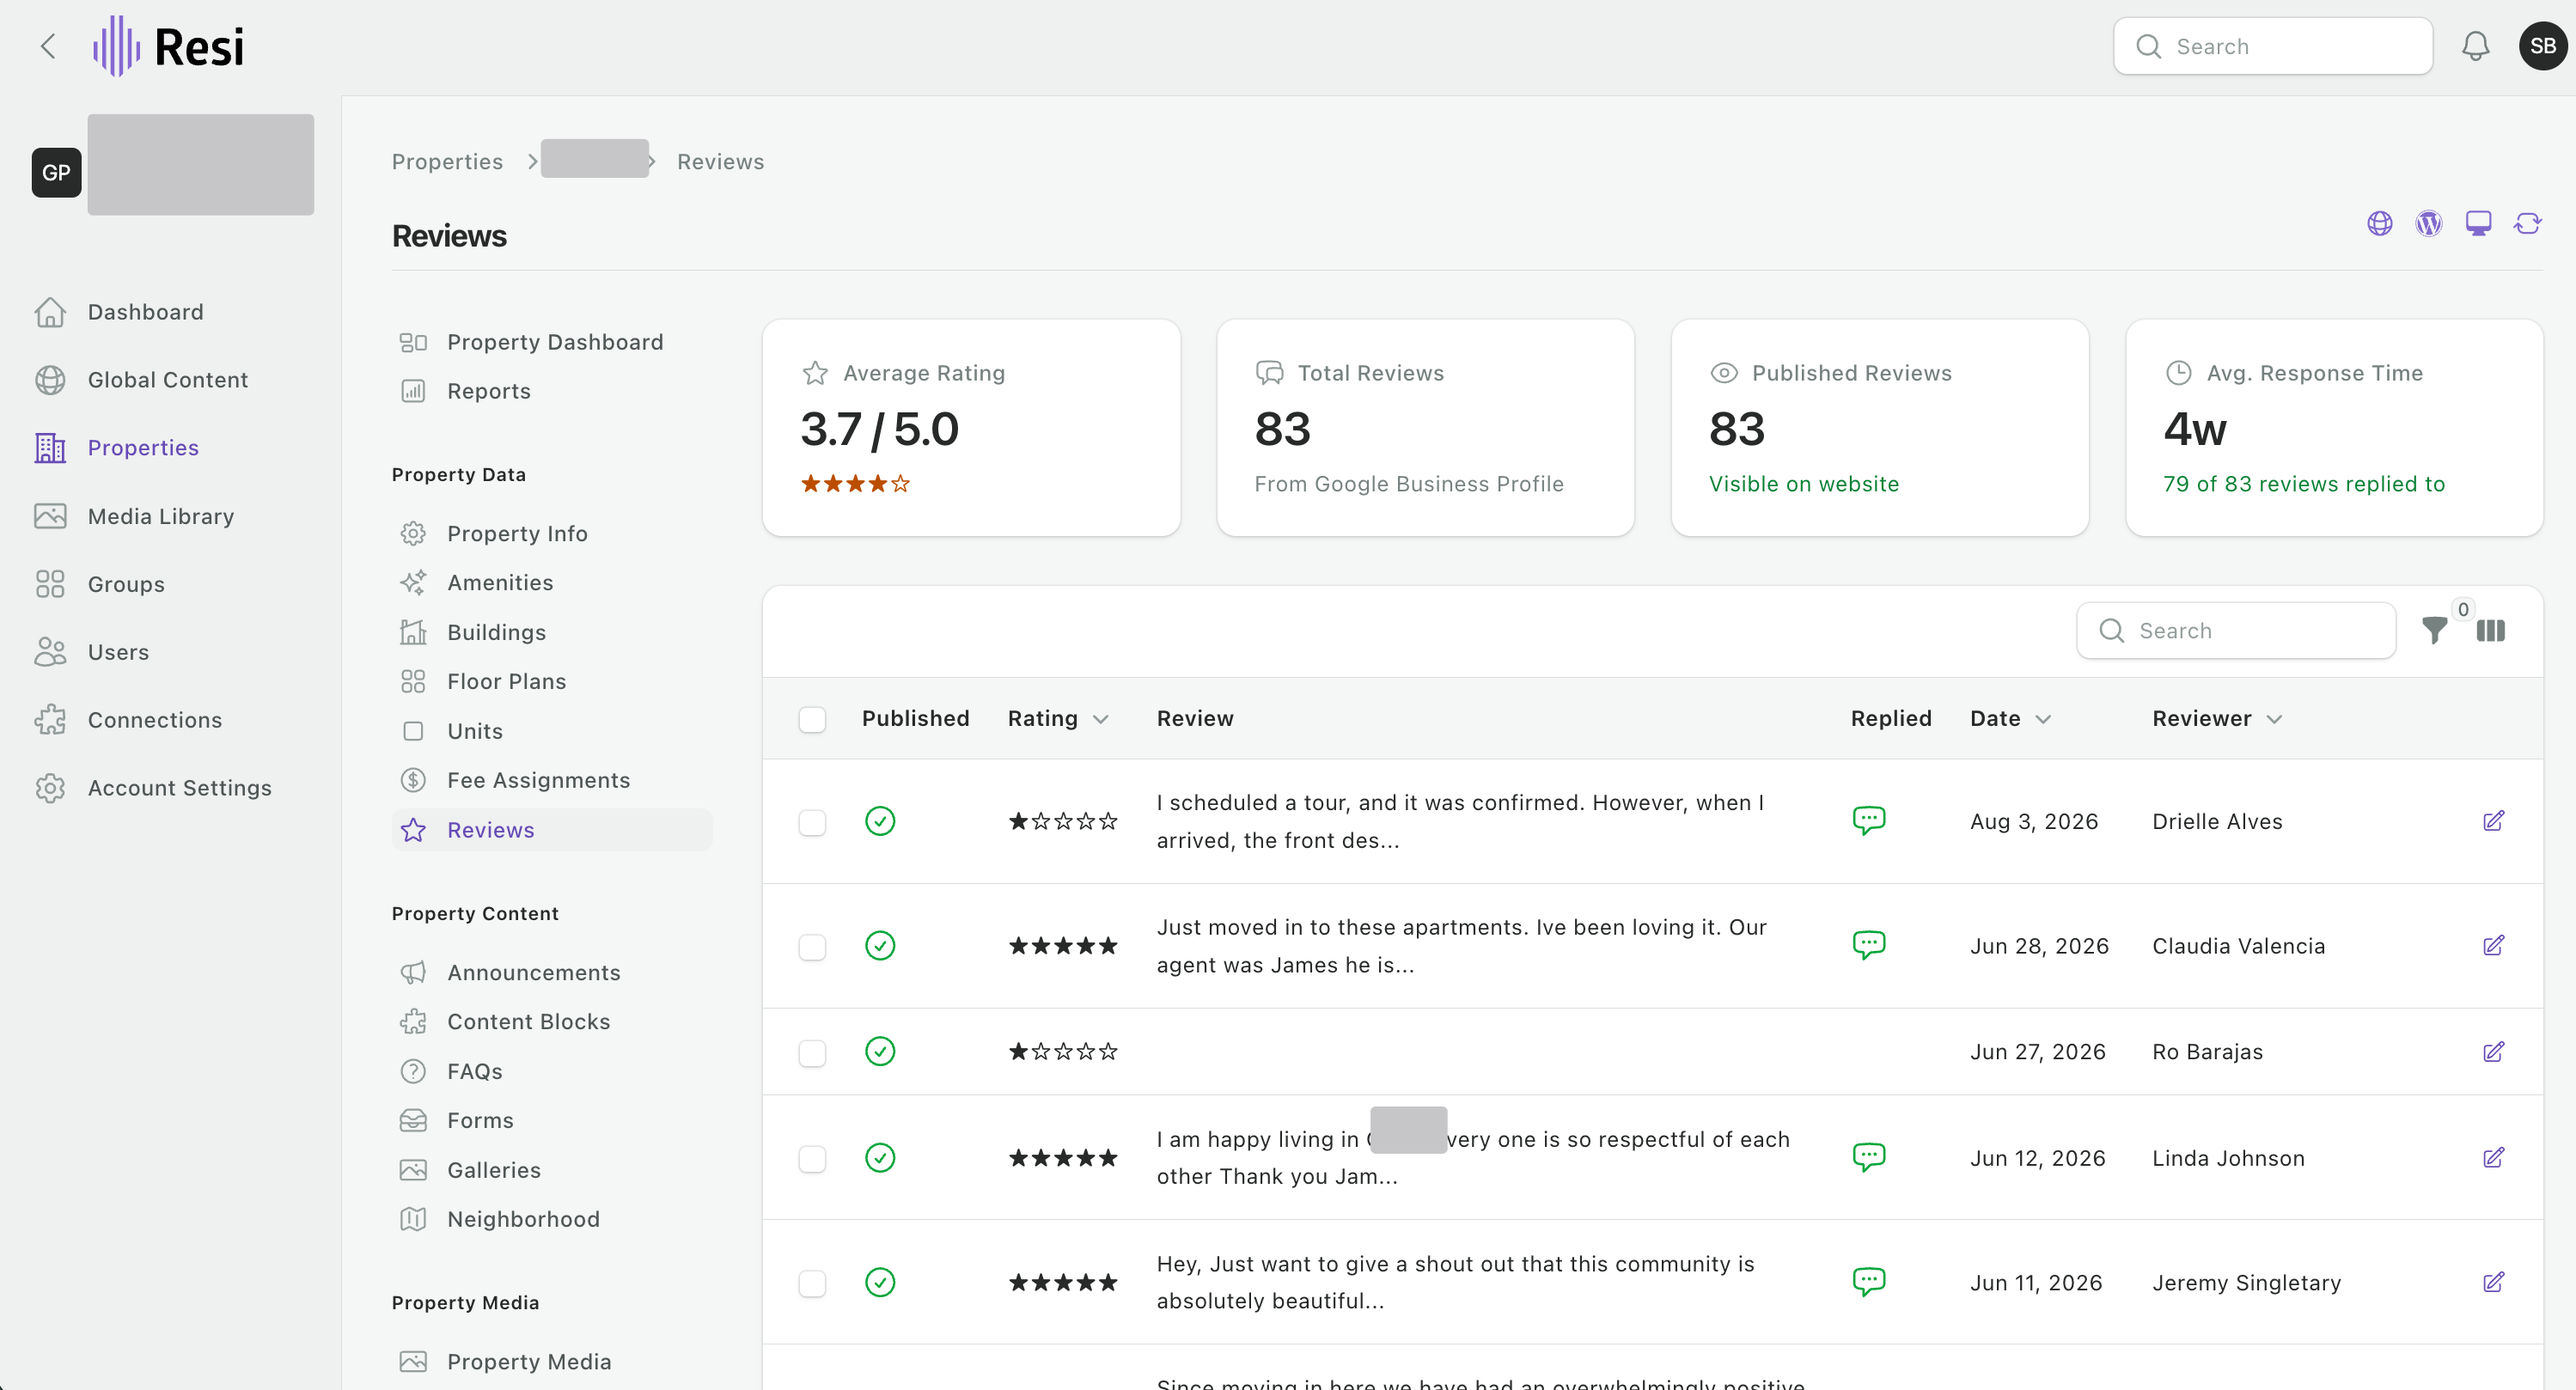
Your reviews come from your Google Business Profile automatically, so your site always reflects your latest rating.
Reviews are synced and read-only here - you manage the reviews themselves in Google.
If you reply to a review in Google, that reply shows too.
A summary at the top of the Reviews page shows your average rating, total reviews, and response time.
By default every review feeds straight to your site. You can unpublish an individual review to keep it off the website while it stays live on Google.
Want the rating without the reviews? Your average rating and total review count can be displayed on their own, with no individual reviews shown. A good option when you're proud of a 4.8 and would rather not surface every comment behind it. Ask support to set it up.
Tip: to get reviews flowing, your Google Business Profile needs to be connected - the Resi team can set that up if it isn't already.
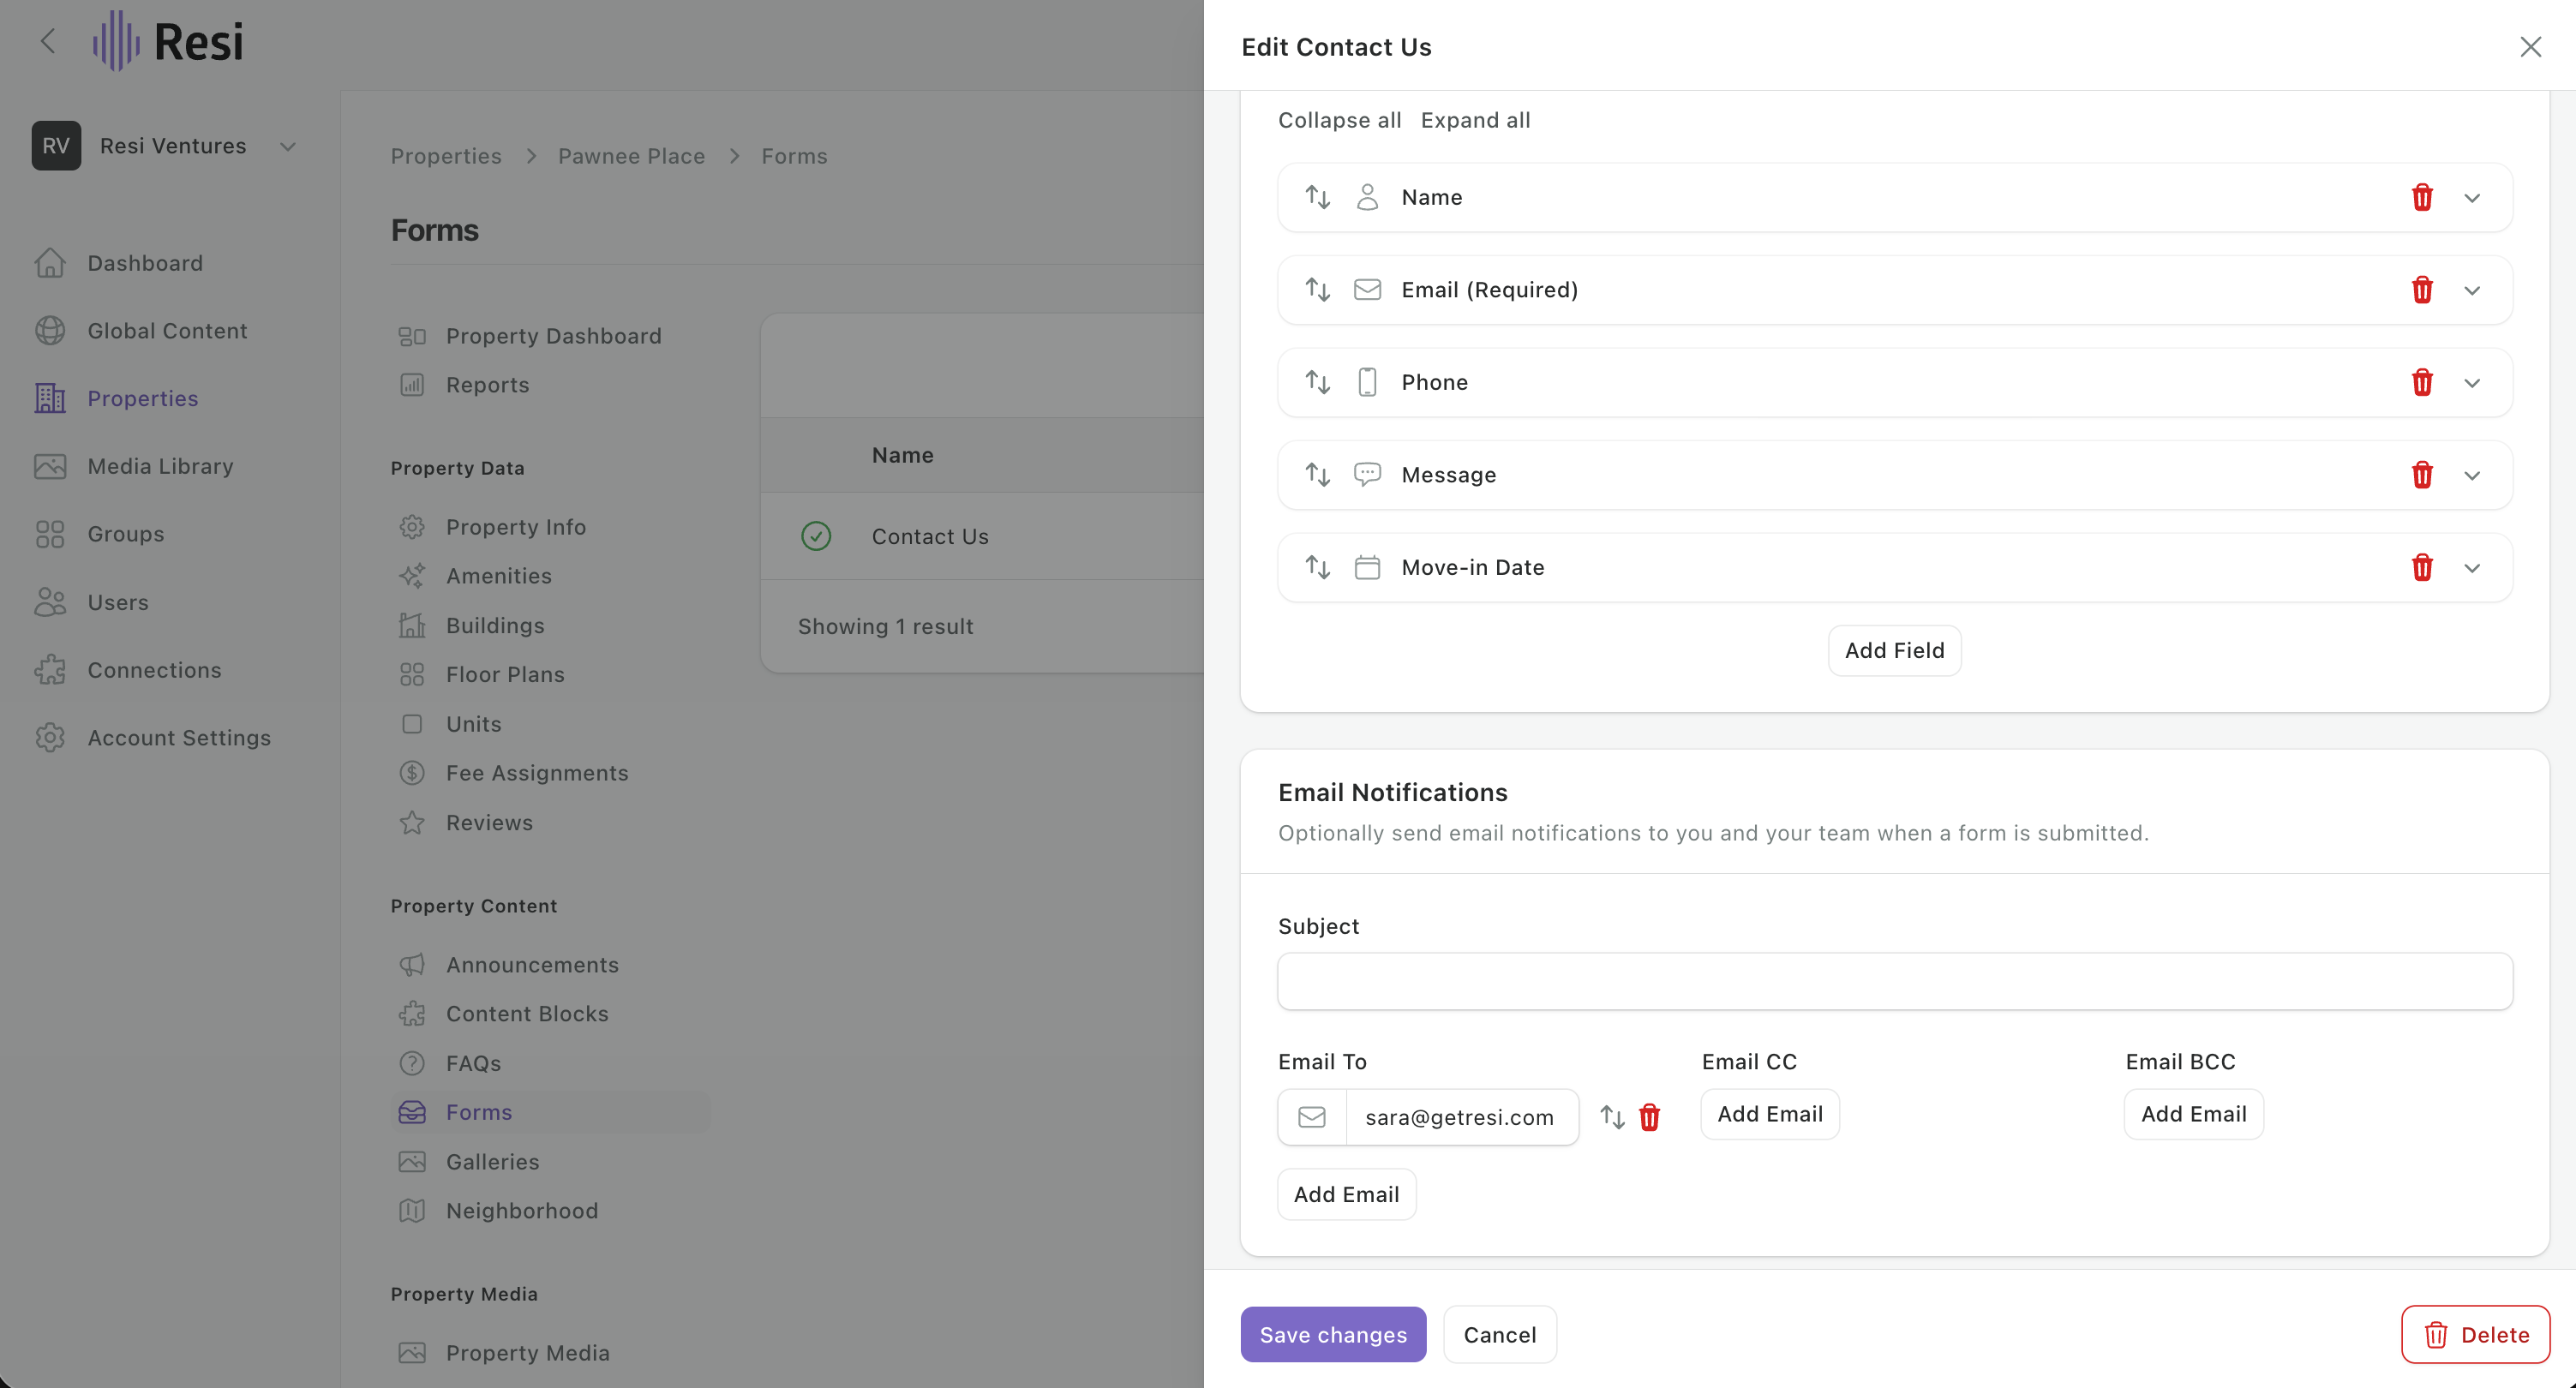
Forms capture leads from your site and route them to the right people.
Tip: send notifications to a shared leasing inbox rather than one person, so a lead never sits unseen when someone's out. Forms also live under Global Content if you want to reuse one across properties.
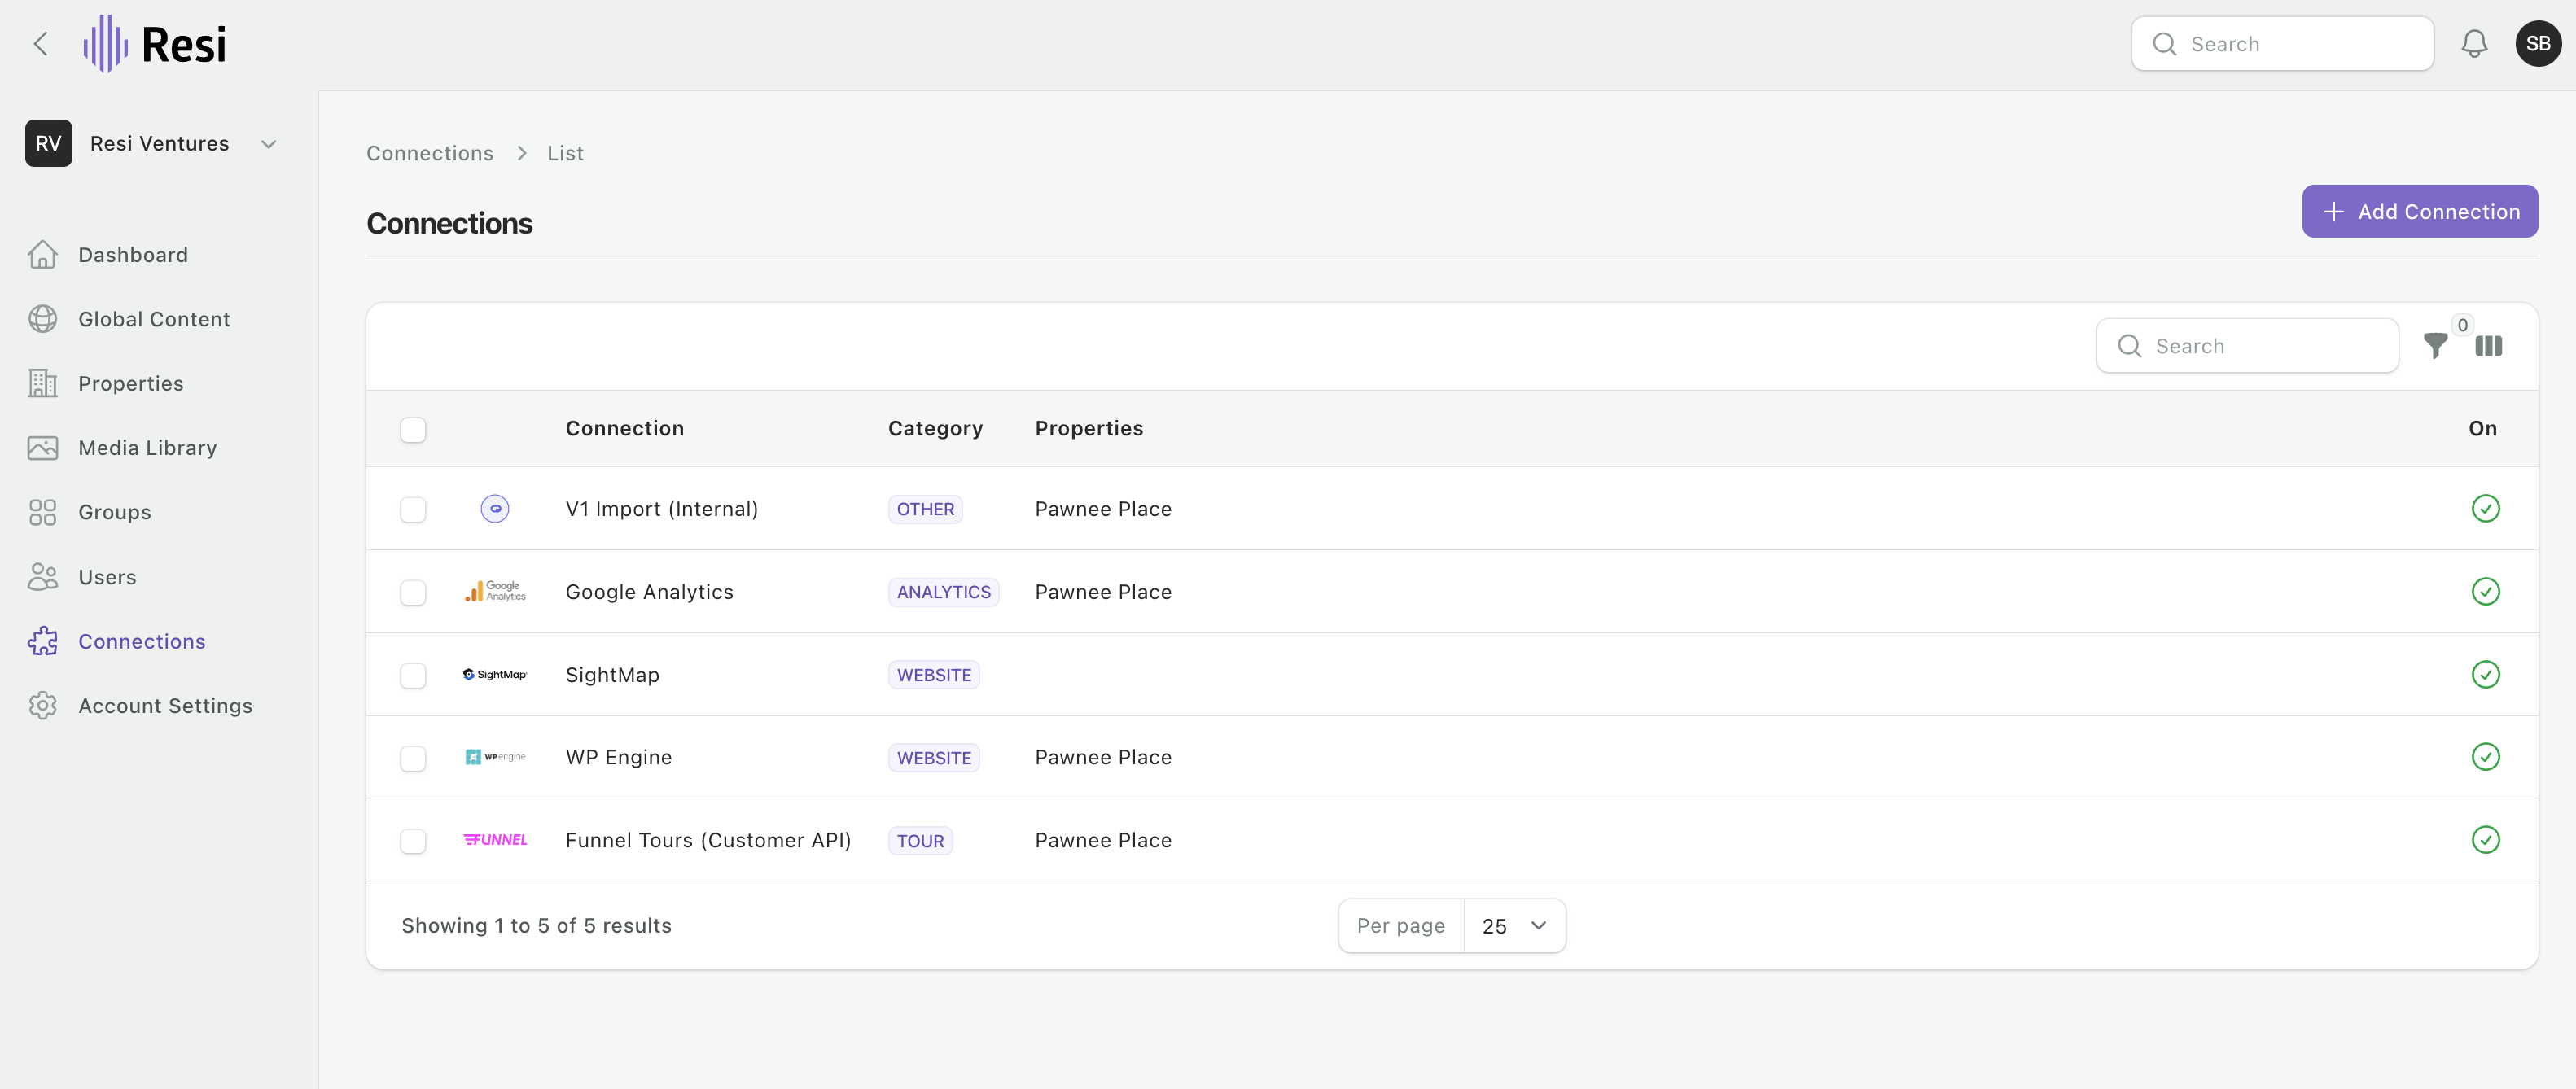
Connections are the links between Resi and the other tools you use - your property management system, CRM, tour software, and more. They're what keep your site's data flowing automatically instead of by hand. You'll see the ones attached to a property in the Connections panel on its dashboard, and all of them under Connections in the sidebar.
Sync errors are handled for you. If a feed fails or a sync hits a problem, Resi flags it and routes it to our support and development teams automatically. It's shown here for transparency, and there's nothing for you to fix.
Every sync is logged, and a failed run is flagged on your dashboard and in the connection's log. Those alerts also go straight to our team, so there's nothing you need to do when one appears. Feeds hiccup - a run that fails and then succeeds a few hours later is normal and usually not worth a ticket.
When something does need digging into, we can see the raw data your PMS sent us on any given run. That's usually how a "why is this amenity showing twice" question gets answered in one pass instead of three.
Most connections are set up for you by the Resi team. Here's what the main types do:
Yardi, Entrata, RealPage, AppFolio, Rent Manager, MRI, DoorLoop, and more. These sync your units, floor plans, pricing, and availability into your site.
Knock, Funnel, AnyoneHome, Lead2Lease, and others. These pass leads from your website into your leasing system.
SightMap, Engrain, Peek, Hyly. These power tour booking and interactive site maps.
Matterport, Realync, Seenic, LCP Media. These add 3D tours and rich media to your listings.
EliseAI, BetterBot, Knock, Perq. These run the chat and AI assistants on your site.
Google Business Profile pulls your reviews in automatically (see Reviews from Google).
Google Analytics and Heap track how visitors use your site.
accessiBe, AudioEye, UserWay add accessibility tools to your site.
Rentgrata and Resify connect prospects with current residents.
Want to add one? Some connections you can turn on yourself; others are set up on request. The Resi team can enable the right one for your property and confirm what it needs.
Most of the time you'll edit content on a property (Property Content). But if you run several properties, you can manage a piece of content once and reuse it everywhere - that's Global Content.
On an individual property, a global item shows as Global and is read-only, so a change in one place doesn't accidentally change every site.
When a single property needs its own version, open that global item on the property and either:
Make a local copy for this property that you can edit freely. It detaches from the global version, so your edits stay on this property only.
Remove this property from the global item entirely.
Tip: edit the global item when a change should apply everywhere; partition when just one property needs something different.
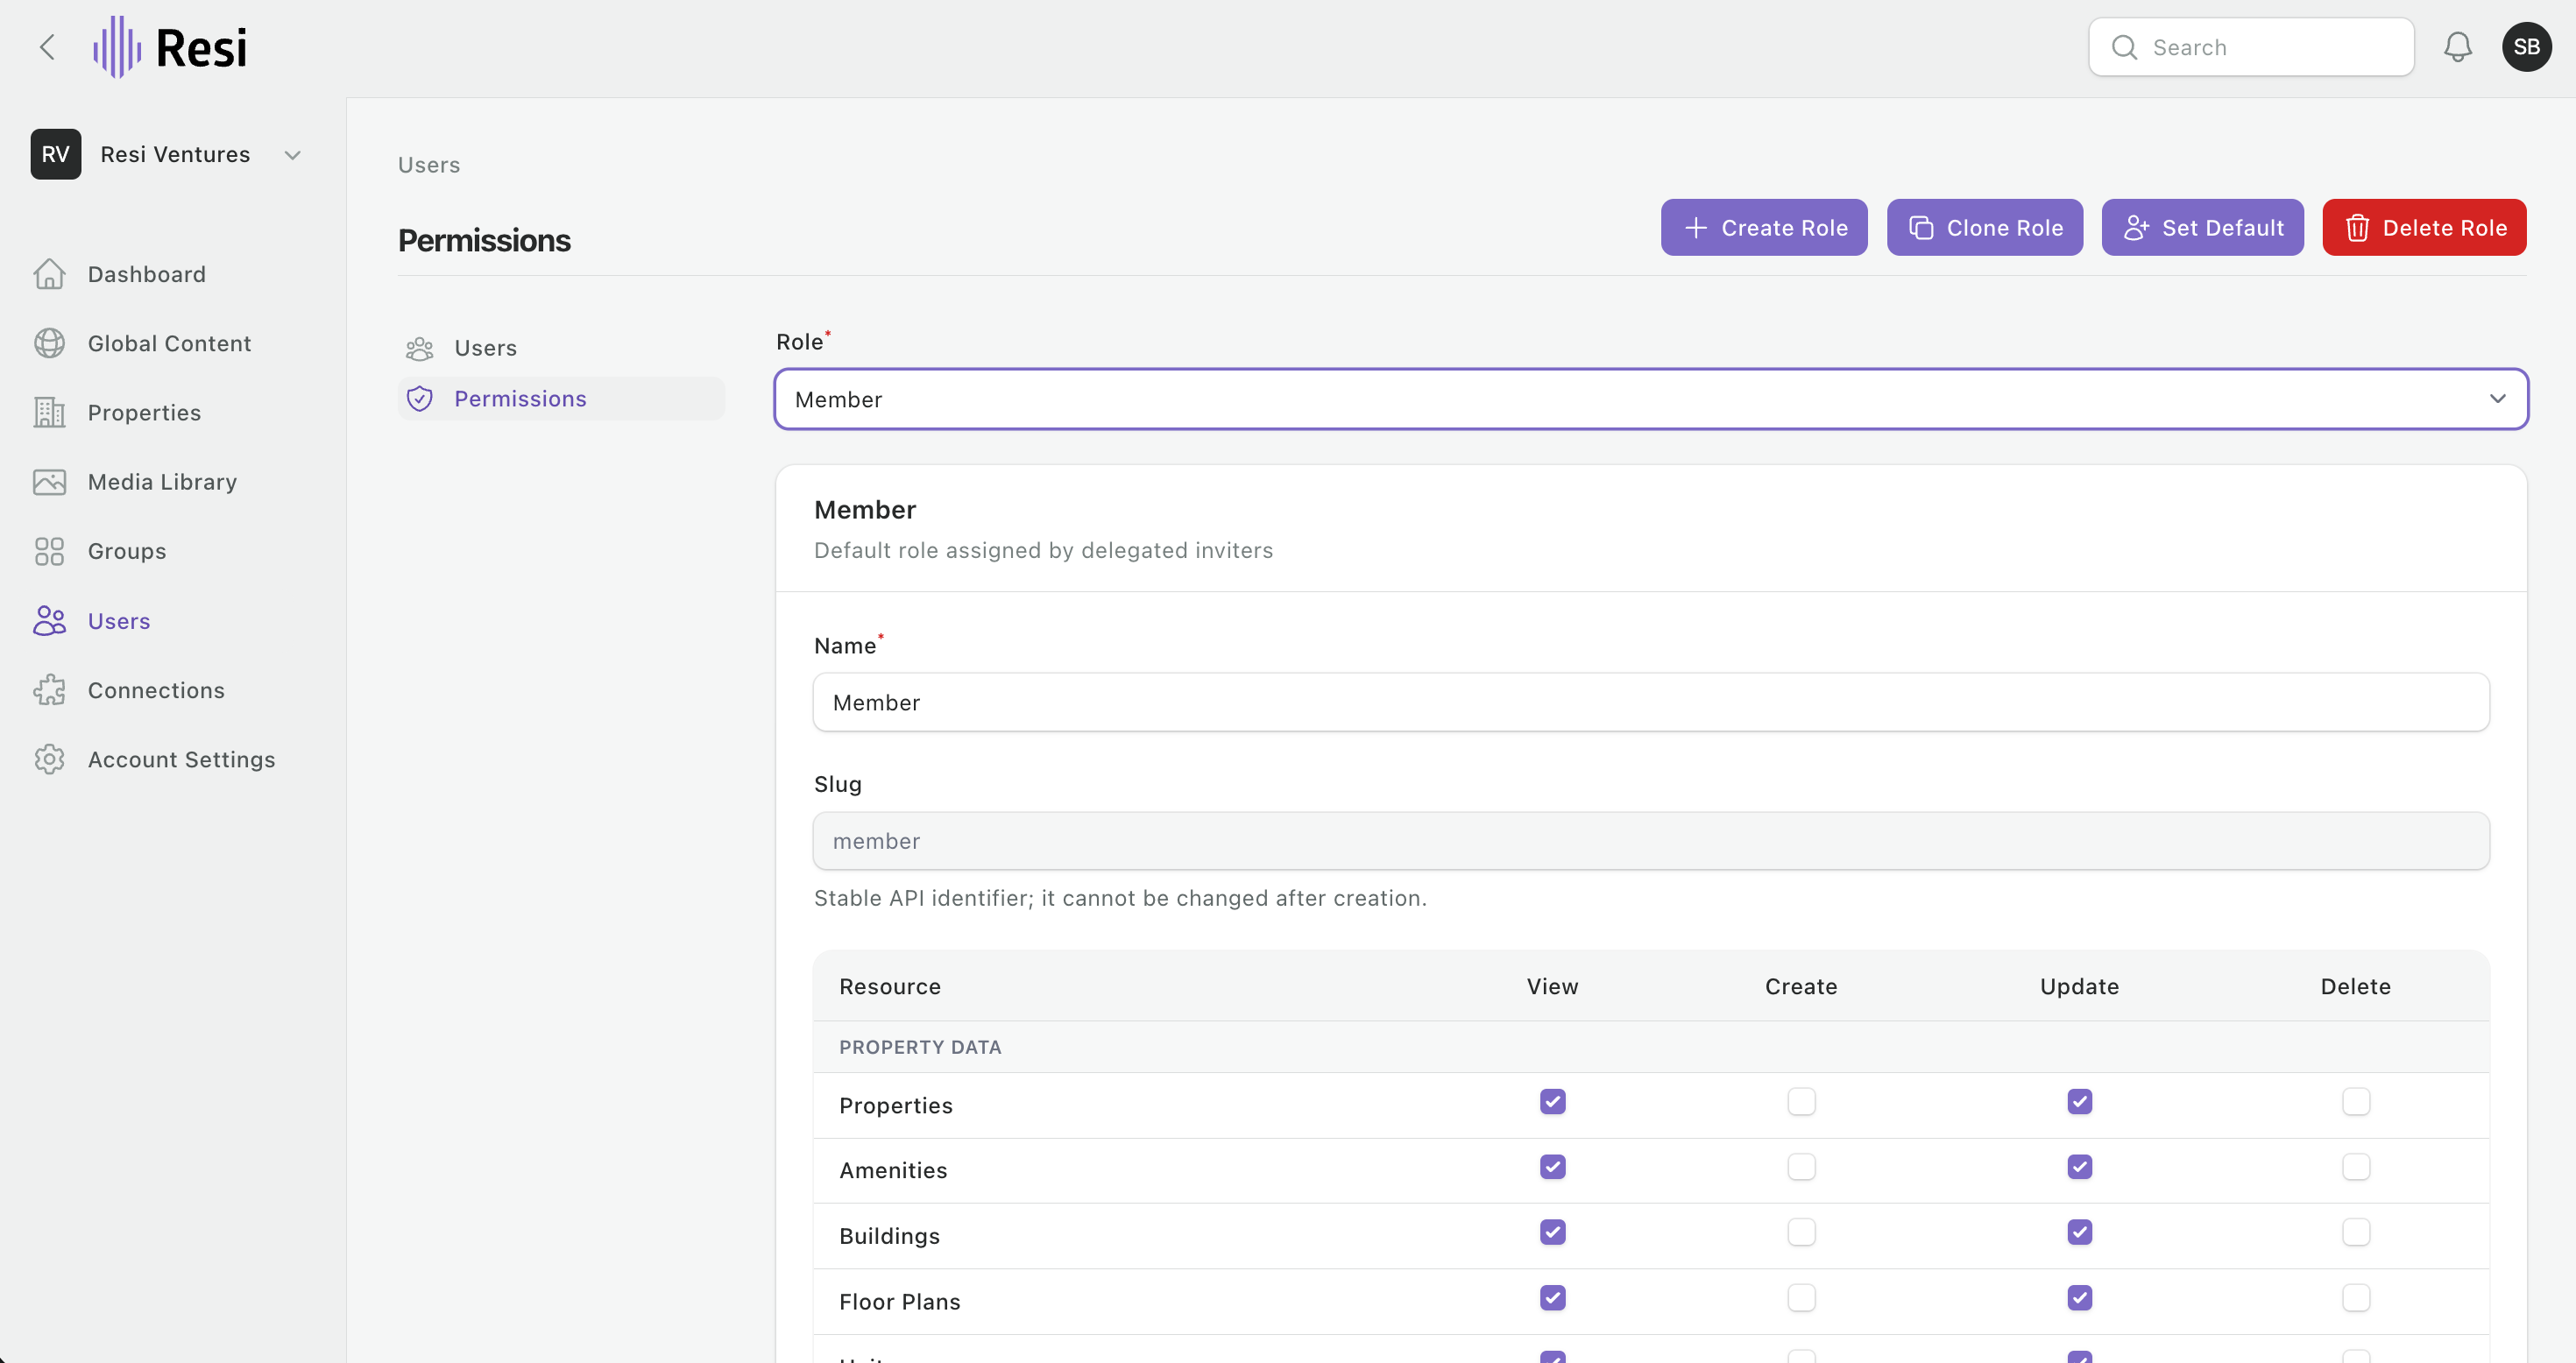
Invite anyone on your team from Users and give them a role. Four roles come set up by default, and you can create your own when none of them fit.
Full access, including account settings and user management.
Day-to-day management of properties and their content.
Edits content on the properties they're given.
Read-only. Useful for ownership and investment groups who only need reports.
Create a role from scratch and pick exactly what it can reach. A common setup is an on-site team that can sign in and post announcements and specials, and nothing else.
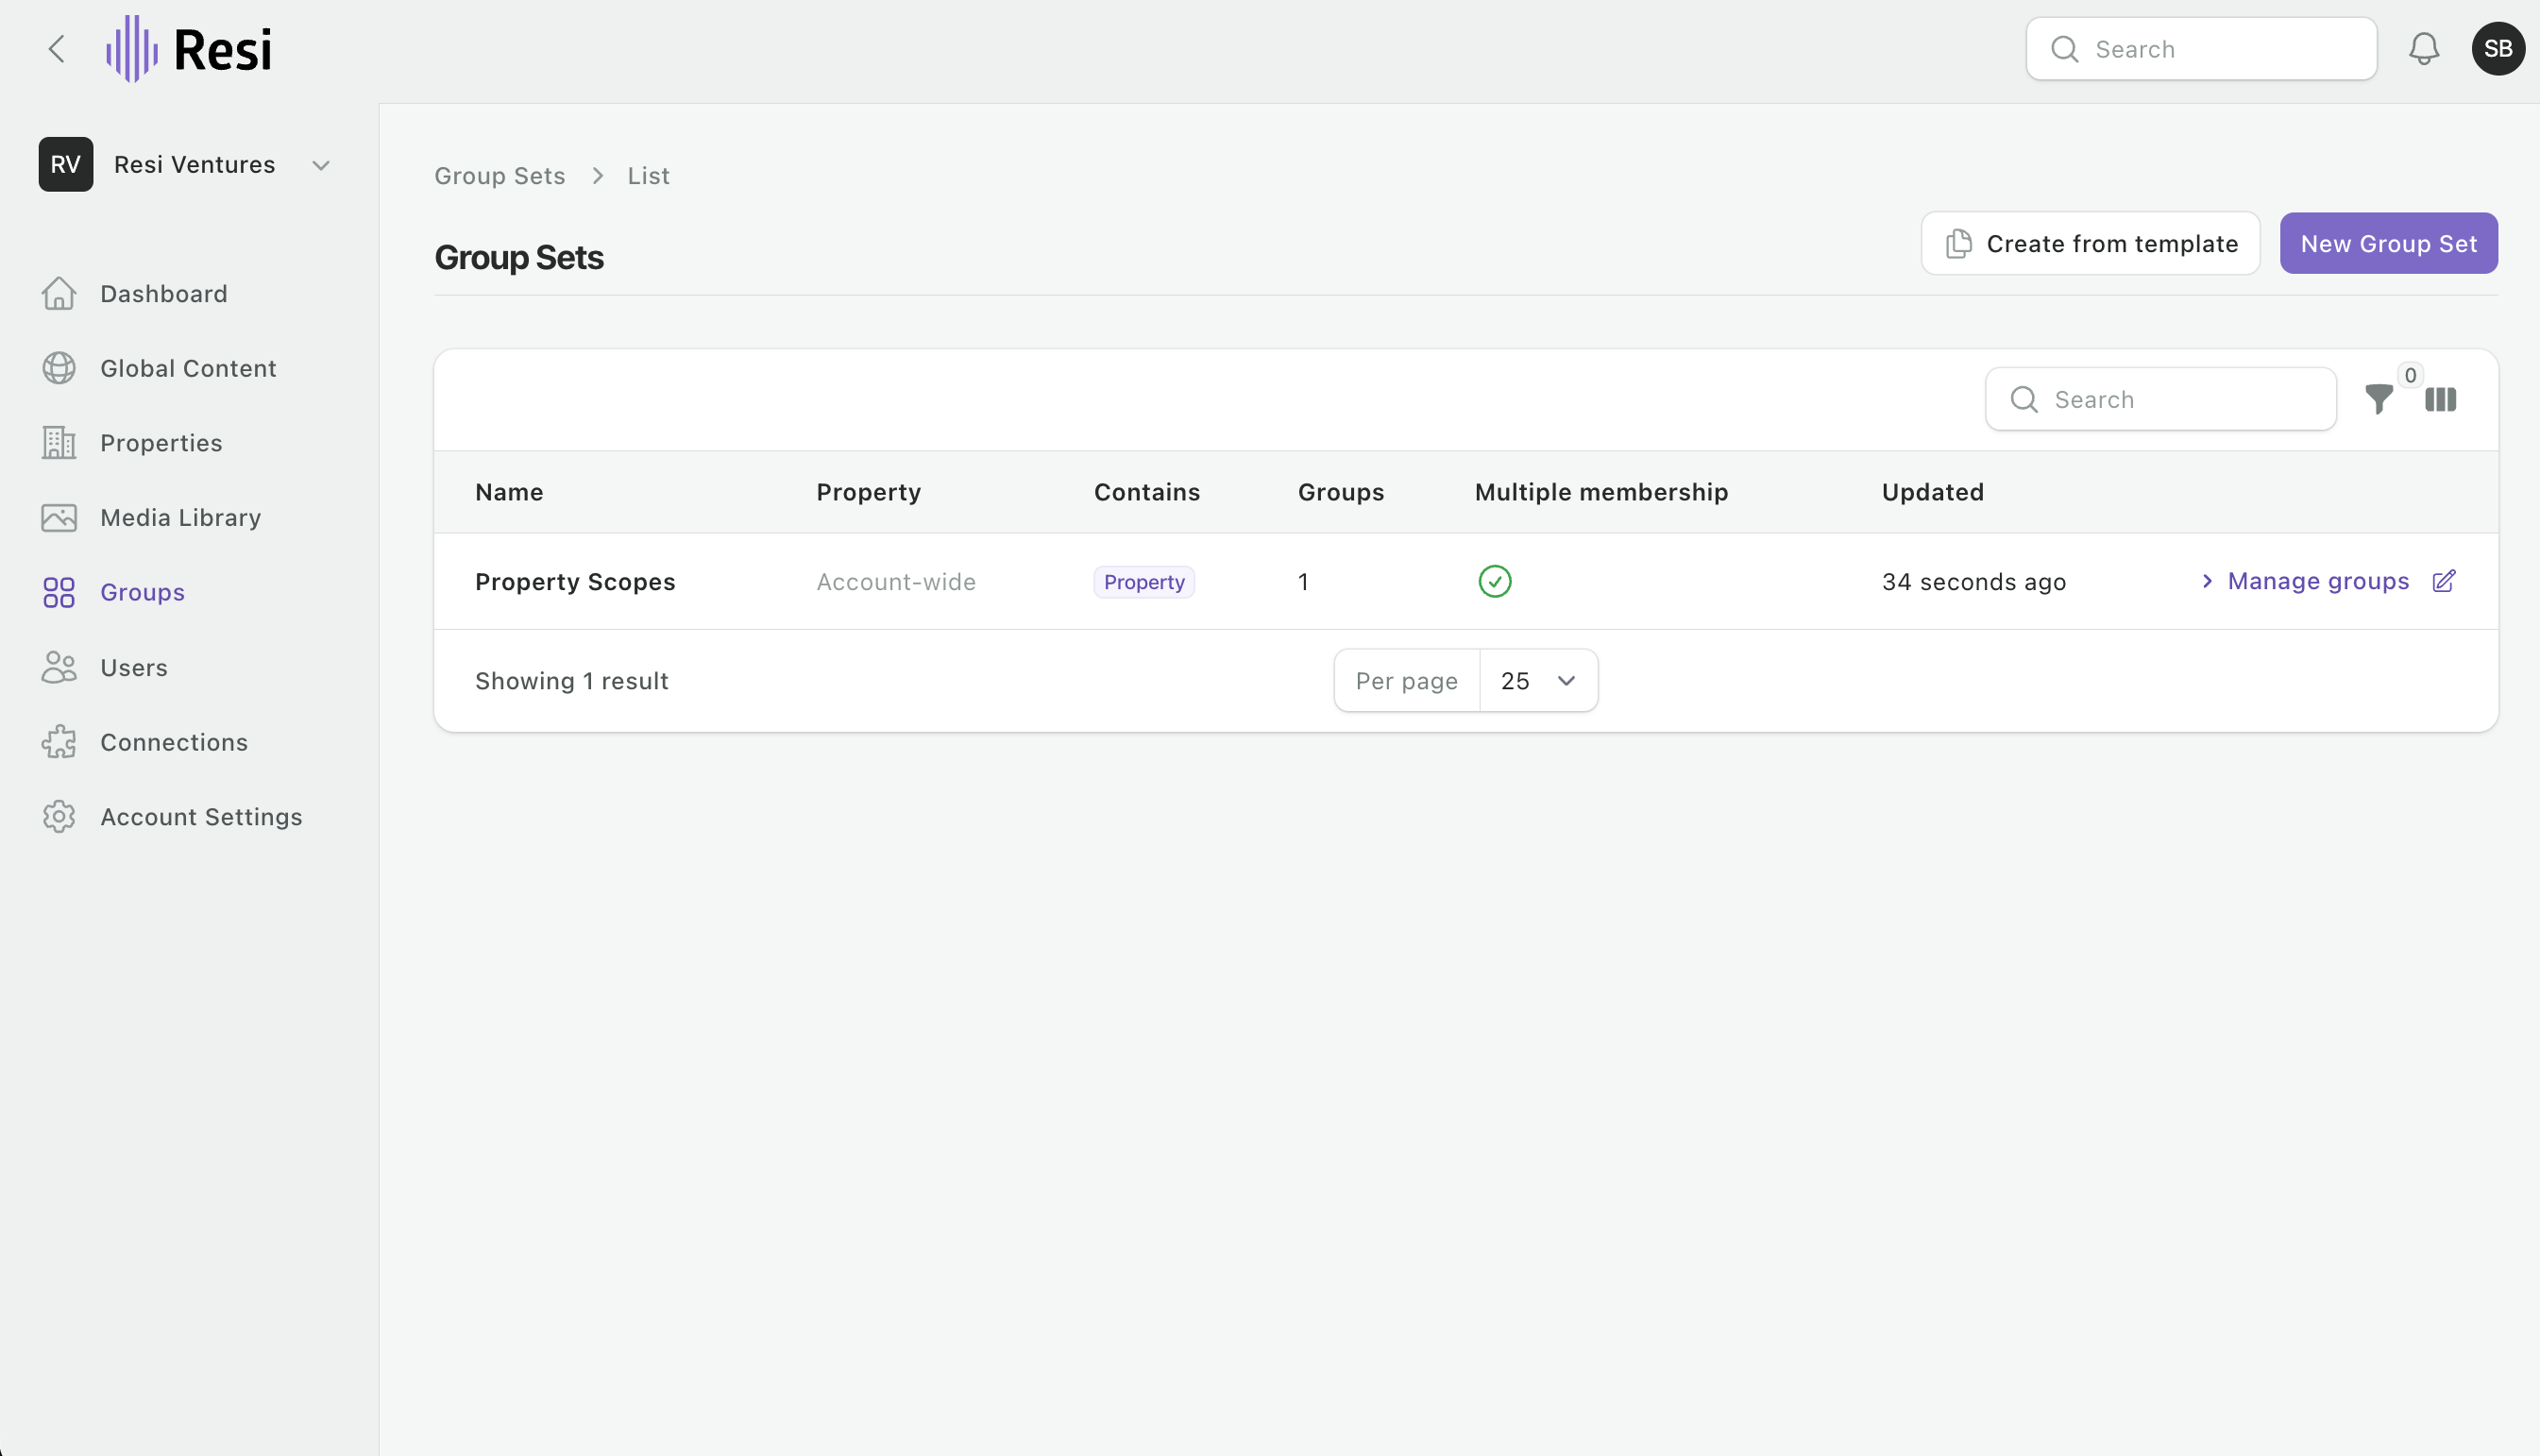
Access can also be scoped to specific properties using Groups. Groups collect properties (or floor plans) so you can assign things in bulk, and a user can be restricted to a single group so they only see their own community.
Resi holds your data and content. The page itself, its layout, and its search metadata live in the site builder.
Content blocks, galleries, announcements, FAQs, forms, amenities, floor plans, units, pricing, and everything the site pulls in.
Title tags and meta descriptions, page layout, animations, and blog posts. Search metadata is not editable in Resi today.
Use Refresh site data in the quick actions by the page title. It runs on a 60 second cycle, so a change appears on the live site within about 60 to 120 seconds depending on where you catch the cycle. A PMS sync clears the site and hosting caches on its own, so you don't need to do both.
Tip: if a change still isn't showing after two minutes, check whether the spot is dynamic. Dynamic sections show what's in your Resi data, so the edit has to happen there. See Content blocks.
A quick reference for what to provide Resi during onboarding, organized by the product you chose. Having these ready upfront keeps your project on track. Send them to your Resi onboarding contact, or attach them to a support request from your property dashboard.
Nice to have: renderings or property photography.
Nice to have: renderings or property photography; background / pattern files or other design elements.
Nice to have: background / pattern files (if in the brand guide); extra design elements.
Nice to have: background / pattern files; additional design elements.
For Theme products, Resi does not source stock images - clients may source from Unsplash, Pexels, or Adobe Stock, and Resi can license Adobe Stock images when you provide the photo IDs. For Custom and Corporate builds, Resi can assist when direction is provided. Anything missing at kickoff becomes a blocker later, so if an item is not ready, say so up front.
Resi reads your floor plans and property data from RentCafe. You will need a RentCafe Site Manager administrator.
Resi's vendor name in RentCafe (and RealPage) is MyCore Industries. If you need help generating your key or finding your codes, contact your account manager or submit a support request.
Resi connects to Entrata through a dedicated API user. You will need someone who can manage Entrata API settings, plus your Entrata account manager to enable access.
When requesting API access, make sure these are enabled:
Questions? Reach out to Resi Support at team.getresi.com/support.
Resi appears in RealPage as MyCore Industries. RealPage requires you, as the property owner, to authorize the vendor - Resi cannot enable itself.
If MyCore is not appearing in search results, check Vendor Requests or Management Integrations under Pending. To submit a Vendor Request, follow RealPage's standard vendor approval process. For further help, contact support@getresi.com.
Google requires proof of your organization's identity before it will run paid ads. Submit at least one document that clearly shows your organization's name.
This covers advertiser identity verification (business documents). Domain verification and Google Business Profile verification are separate processes.
Most day-to-day questions are answered right here in the guide. When something needs us, open a ticket below. The more of this you fill in, the faster it comes back solved.
Swapping photos, updating copy, points of interest, announcements - anything you could do yourself in the app. Send it over and we'll handle it at no charge.
Layout changes, moving sections, new sections, and anything needing code go through design hours. You'll always get a quote to approve before any work starts.
You never have to guess which is which. Send the ticket either way. If it's out of scope we'll tell you, quote it, and wait for your approval - nothing gets billed without it.
Every ticket is acknowledged automatically within two minutes, with a summary of what you sent and when to expect a person. From there it depends on what the request is.
Monday to Friday, 9 AM to 6 PM Eastern. Tickets sent outside those hours are waiting for us when we open.
New Year's Day, Memorial Day, July 3, Labor Day, Thanksgiving Thursday and Friday, and December 24 and 25. Timelines pause on those days.
Something urgent, including after hours? Submit it through the form the same way you'd submit anything else. Our triage team flags a site outage, a leasing-blocking failure, zero availability, or a security issue as business critical and starts emergency escalation - you don't have to mark it yourself or find a different channel.
A real team reads every ticket. These are some of the people on the other end.
Every change we ship to the Resi platform, newest first.
{{ rel.summary }}